
You may have woken with a numb hand, felt pins and needles running down your arm, or noticed a burning, stabbing pain travelling from your back into your leg. When this happens, it is common to wonder:
Have I trapped a nerve? Does tingling mean the nerve is damaged? Why do I feel pain in my hand if the problem is coming from my neck? Will I need a scan? Can physiotherapy help?
Nerve-related symptoms can be confusing because the place where you feel them is not always where the problem begins. The nerve pathways supplying your hand connect back to your neck, while those supplying your foot connect back to your lower back. Irritation anywhere along a pathway may cause symptoms further away.
This article explains what nerve pain is, what different nerve symptoms may mean and the main places a nerve problem can develop.
What is nerve pain?
“Nerve pain” is a general term for pain or unusual sensations linked to the nervous system. It can occur when a nerve is compressed, irritated, inflamed, sensitised or damaged.
Nerve-related symptoms can feel different from the dull ache of a sore muscle or joint. They may include:
- burning, shooting or electric-shock-like pain
- pins and needles or tingling
- numbness or reduced feeling
- unusual sensitivity to touch, heat or cold
- pain that travels along an arm or leg
- weakness, reduced grip or difficulty controlling a limb
One symptom alone cannot confirm nerve damage. Pins and needles after sitting awkwardly or sleeping on an arm usually settle once the pressure is removed. The pattern, duration and effect on strength help determine whether assessment is needed.
Common questions about neuropathic pain
Does tingling mean I have permanently damaged a nerve?
Usually, no. Brief tingling often occurs when temporary pressure affects the nerve’s signals. Constant or recurring symptoms, especially with weakness, need assessment—but nerves can be irritated or sensitive without being permanently injured.
Is a “pinched nerve” actually trapped?
Not always. A nerve or nerve root may be compressed, inflamed or irritated. Scan findings also do not always match a person’s symptoms: some people have visible changes without pain, while others have significant symptoms with little change on imaging.
Why can a problem in my neck cause symptoms in my hand?
The nerves supplying your hand connect to nerve roots in your neck. Irritation near the beginning of this pathway can produce symptoms further along it. Similarly, lower-back irritation can cause symptoms in the leg or foot.
Can tight muscles press on a nerve?
Sometimes, but “a tight muscle trapping the nerve” is often too simple. Muscles may contribute to pressure or sensitivity, while the spine, joints, swelling and narrow spaces along the nerve may also need consideration.
Do I need a scan?
Not necessarily. Many problems can be identified from the history and physical examination. A scan or nerve-conduction test is more useful when the diagnosis is unclear, symptoms are worsening or the result would change treatment.
Can physiotherapy help?
Yes. Education, activity changes, movement and graded exercise can help many nerve-root irritations, entrapments and sensitive nerves. If an underlying condition or significant nerve injury is suspected, your physiotherapist may recommend medical or specialist review.
Understanding the pathway of a nerve
The brain and spinal cord form the central nervous system. Nerve roots leave the spinal cord through openings between the bones of the spine. They connect within networks called plexuses, then continue into the arms and legs as peripheral nerves. Smaller branches reach the skin, muscles and joints.
In simple terms, the pathway is:
Brain and spinal cord → nerve roots → nerve networks → peripheral nerves → skin and muscles
For example, the median nerve involved in carpal tunnel syndrome is formed from nerve roots in the neck. It travels through the arm and forearm before entering the hand through the carpal tunnel at the wrist.
Think of this pathway like a power cable running from a power source to a light. A problem anywhere along the cable may affect the light at the other end. Similarly, hand symptoms may come from the wrist, but they can also begin further up the pathway.
What happens when a nerve is irritated?
Nerves carry electrical messages. Sensory fibres carry information about touch, pain and temperature; motor fibres carry instructions to the muscles.
Pressure or inflammation can interfere with these signals. Mild irritation may cause intermittent tingling, while persistent irritation can produce pain or numbness. If motor fibres are affected, weakness, reduced grip or poor control may occur. Severe or prolonged compression can sometimes cause lasting sensory loss or muscle wasting, so progressive weakness should not be ignored.
Where can a nerve problem begin?
1. At a nerve root near the spine
A problem where a nerve root leaves the spine is called radiculopathy. In the neck, this is known as cervical radiculopathy. In the lower back, it is called lumbar radiculopathy.
A disc bulge or herniation may irritate a nerve root. Age-related disc and joint changes can also reduce the available space, although these changes do not always cause pain.
A neck nerve-root problem may cause neck or shoulder-blade pain, arm or hand symptoms, numbness or weakness. A lower-back nerve-root problem may cause back or buttock pain, leg pain often called sciatica, foot tingling or leg weakness.
Each root is linked with certain areas of skin, muscles and reflexes. These patterns guide the assessment, although symptoms do not always follow a perfect textbook map.
2. Within a nerve network
Several nerve roots meet within networks called plexuses. The brachial plexus supplies the shoulder and arm; the lumbosacral plexus supplies the pelvis and leg.
Forceful stretch, trauma, sustained pressure, inflammation or another condition can affect a plexus. Because several nerves may be involved, pain, altered feeling or weakness can spread across a wider area rather than following one neat line.
3. Along a peripheral nerve
A peripheral nerve entrapment occurs when a nerve is compressed after leaving the spine, often where it passes through a narrow tunnel, around a bone or beneath a firm band of tissue.
Common examples include:
| Condition | Nerve affected | Common site |
| Carpal tunnel syndrome | Median nerve | Wrist |
| Cubital tunnel syndrome | Ulnar nerve | Inner elbow |
| Radial tunnel syndrome | Radial nerve or one of its branches | Forearm |
| Tarsal tunnel syndrome | Tibial nerve | Inner ankle |
Swelling, injury, prolonged positions, repetitive activity, joint changes, scar tissue or a naturally narrow space may contribute.
In carpal tunnel syndrome, pressure affects the median nerve at the wrist. Symptoms commonly involve the thumb, index and middle fingers and the thumb-side of the ring finger, and are often worse at night. Grip or fine hand tasks may become difficult. The little finger usually remains unaffected because it has a different nerve supply.
4. Around the nerve
Nerves slide past muscles, joints and connective tissues as the body moves. Swelling, scarring or reduced space around a nerve may make this movement uncomfortable.
The sciatic nerve, for example, passes through the deep buttock near several muscles. Irritation here can sometimes cause buttock and leg symptoms, although the lower back and the rest of the nerve pathway must also be assessed.
5. When a nerve becomes more sensitive
Sometimes there is no major ongoing compression, but the nerve responds more strongly than usual to movement or pressure. This is called increased nerve mechanosensitivity.
This can develop after injury, inflammation, surgery or ongoing irritation. Normal movements may reproduce tingling, pulling or pain. This does not mean the pain is imagined or that movement is causing further damage; the nerve has simply become easier to provoke.
6. When multiple peripheral nerves are affected
Peripheral neuropathy involves disease or damage affecting several peripheral nerves rather than one local compression point. Causes include diabetes, vitamin B12 deficiency, alcohol-related disease, chemotherapy, autoimmune or kidney disease, infections, inherited conditions and some medications.
It often affects the longest nerves first, so symptoms may begin in both feet, move up the legs and later affect the hands. This is sometimes called a “stocking and glove” pattern.
Burning pain, numbness, reduced awareness of injury, weakness and balance problems can occur. Treatment depends on the cause, so suspected neuropathy needs medical investigation rather than local treatment alone.
7. In the brain or spinal cord
Not every nerve-like symptom begins in a peripheral nerve. The brain and spinal cord can also cause changes in feeling, movement and coordination.
Pressure on the spinal cord in the neck may cause hand clumsiness, balance or walking changes, or symptoms on both sides. Other central nervous system conditions, including stroke and multiple sclerosis, can also alter sensation or strength. These symptoms need medical assessment and may require urgent care.
How is the cause identified?
A physiotherapist will ask where the symptoms are felt, when they began, what changes them and whether there is weakness. The examination may assess sensation, strength, reflexes, coordination and movement of the spine and nearby joints. Specific tests may check how a nerve responds to movement or gentle pressure.
The aim is to work backwards from the symptoms:
Where you feel it → peripheral nerve → nerve network → nerve root → spinal cord or brain
No one finding gives the complete answer. The symptom pattern, history and examination are considered together before deciding whether early treatment, further testing or referral is needed.
When should you seek urgent medical care?
Seek urgent help for:
- sudden facial drooping, arm or leg weakness, or difficulty speaking
- rapidly worsening weakness or loss of coordination
- new loss of bladder or bowel control
- numbness around the groin, buttocks or inner thighs
- severe symptoms affecting both legs
- neurological symptoms following significant trauma
Arrange a prompt assessment if numbness is persistent, weakness is progressing, muscles appear to be wasting, your balance is deteriorating or symptoms occur with unexplained fever, weight loss or a history of cancer.
Final thoughts
There are different types of nerve pain. Nerve pain is not one condition with one treatment. It may begin near the spine, within a nerve network, along a peripheral nerve, in surrounding tissues or as part of a wider medical condition.
The important point is that where you feel the symptom is not always where the problem begins. A careful assessment helps identify the most likely source so that effective treatment can address the cause rather than focusing only on the painful or numb area.
This article provides general information and is not a substitute for individual medical advice. Seek assessment if you are concerned about pain, altered sensation, weakness or loss of coordination.
Further reading
- Cervical Radiculopathy (Pinched Nerve) — American Academy of Orthopaedic Surgeons
- Carpal Tunnel Syndrome — American Academy of Orthopaedic Surgeons
- Peripheral Neuropathy — National Institute of Neurological Disorders and Stroke
- Cervical Spondylotic Myelopathy — American Academy of Orthopaedic Surgeons
West Pennant Hills Physiotherapy @ Sports Injuries Centre
02 98753760
What’s Normal and What’s Not?
“Know the difference before it becomes an injury”
Have you ever left a physiotherapy appointment feeling better, only to wake up the next day wondering:
“Why am I more sore than yesterday?”
You’re not alone.
One of the most common questions we hear in the clinic is whether discomfort after treatment is normal—or whether it’s a sign that something is wrong.
The good news? Some soreness after physiotherapy is completely expected. However, there are certain symptoms that may indicate a need for reassessment.
Understanding the difference between normal post-treatment soreness and concerning pain can help you recover confidently and get the most from your treatment.
“Why Can I Feel Sore After Physiotherapy?”
Many patients experience some degrees of soreness after physiotherapy sessions, particularly after involvement of following: –
- Manual therapy
- Joint mobilisations
- Soft tissue treatment/ deep tissue work
- Dry needling
- Strengthening exercises
- Movement retraining
- Return to activity after injury
Just like starting a new gym program, these can challenge tissues that may not have been used or loaded recently.
As your body adapts, mild soreness can occur.
Think of it like cleaning out a dusty room—the process may stir things up temporarily before things improve.
What is Muscle Soreness?
Muscle soreness is a normal response to physical activity, especially when you’ve:
- Started a new exercise program
- Increased workout intensity
- Returned to exercise after a break
- Performed repetitive movements for longer than usual
This type of soreness is commonly known as Delayed Onset Muscle Soreness (DOMS) and typically appears 12–48 hours after exercise.
Signs of Muscle Soreness
Feels like a dull ache or stiffness
Affects both sides of the body equally
Improves with gentle movement
Peaks within 24–72 hours
Gradually resolves within a few days
Example: After a leg workout, your thighs may feel stiff and tender when walking upstairs for a couple of days.

Muscle soreness is a normal part of body’s adaptation to any form of exercise performed.
Normal Responses expected after a physiotherapy session include
- Mild aching in the treated area
- Feeling like you’ve done a workout
- Temporary muscle stiffness
- Slight fatigue
- Symptoms that settle within 24–72 hours
- Mild tenderness when pressing on the area
In fact, mild soreness can sometimes be a sign that your body is adapting to the treatment and exercise program.
What is Pain?
Pain is your body’s warning signal that something may be injured, irritated, or not functioning correctly.
UNLIKE SORENESS, PAIN OFTEN INDICATES THAT TISSUES SUCH AS MUSCLES, TENDONS, LIGAMENTS, JOINTS, OR NERVES MAY BE UNDER EXCESSIVE STRESS OR DAMAGED.
Signs of Pain/ What isn’t normal
While some discomfort can be expected, physiotherapy should not cause severe or progressive worsening symptoms like:
Sharp, stabbing, burning, or shooting sensation such that it limits movement
Appears during activity or suddenly afterward that prevents normal day-to-day activities
Localised to a specific area
Causes limping or altered movement
Persists or worsens over time which may result in weakness
May be accompanied by swelling, bruising, weakness, tingling or numbness
Example: A sudden sharp pain in your knee while running that forces you to stop immediately.
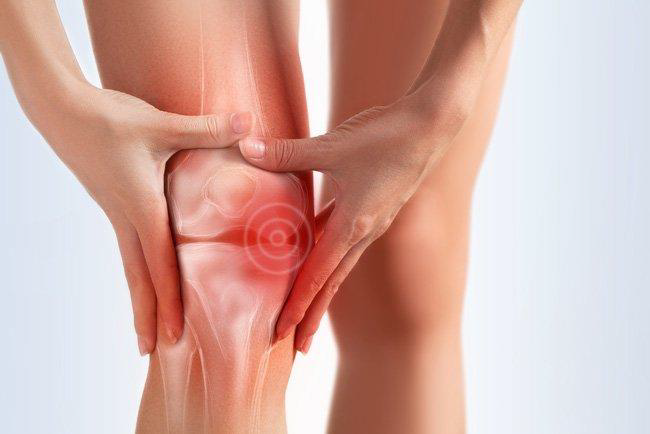
Contact your physiotherapist immediately if you experience any of the above mentioned symptoms
These symptoms don’t necessarily mean something serious has happened, but they do warrant a discussion with your physiotherapist.
| Normal Soreness | Concerning Pain |
| Dull ache | Sharp or stabbing |
| Feels like a workout | Feels like injury |
| Improves with movement | Worsens with movement |
| Settles within 1–3 days | Persists or escalates |
| Mild stiffness | Significant loss of function |
| Manageable discomfort | Difficult to perform daily activities |
Why Might Symptoms Temporarily Increase?
Recovery is rarely a straight line.
Sometimes symptoms can increase temporarily because
- Tissues Are Being Loaded Differently
Rehabilitation often introduces movement patterns your body has been avoiding or it has not been habituated to perform that pattern.
- Your Body Is Adapting
Just like getting stronger at the gym, adaptation requires some challenge.
- Sensitive Areas Are Being Retrained
More painful conditions involve increased sensitivity of tissues and the nervous system. Carefully graded exercise helps reduce that sensitivity over time.
A short-term increase in symptoms doesn’t always mean damage is occurring.
How Much Pain Is Acceptable?
A useful rule is the 24-Hour Response Test
If symptoms:
- Remain mild
- Improve within 24 hours
- Return to baseline within 48-72 hours
- Don’t significantly affect your daily activities
Then the exercise or treatment intensity was generally appropriate.
If symptoms continue escalating or significantly impact function, your program may need adjusting.
What Should I Do If I’m Sore After Treatment?
Simple strategies can help:
- Stay gently active
- Continue light movement
-Follow your home exercise plan
- Stay hydrated
- Prioritise sleep and recovery
- Monitor symptoms rather than focusing on a single painful moment
Avoid complete rest unless specifically advised, as movement often helps reduce stiffness and promote recovery.
Normal soreness is usually mild, temporary, and improves within a few days.
However, severe, worsening, or unusual symptoms should always be discussed with your physiotherapist.
If you’re ever unsure whether what you’re feeling is expected, reach out to your treating physiotherapist. We’d much rather answer a question early than have you worry unnecessarily.
How Physiotherapy Can Help Manage Pain
At our clinic, we help patients identify the source of their discomfort and create personalised treatment plans to get them moving confidently again.
Our physiotherapists can:
- Diagnose the cause of pain
- Identify movement dysfunctions
- Provide hands-on treatment
- Design rehabilitation programs
- Help prevent future injuries
Need Advice?
If you’ve recently started physiotherapy and aren’t sure whether your symptoms are normal, contact our team. We’re happy to help guide you through your recovery and ensure you’re progressing safely.
Ready to Move Better?
If pain is limiting your activities, our experienced physiotherapy team is here to help. To book an assessment today and take the first step toward a stronger, healthier body you can call us on 0298753760, you can book online.
Let’s be clear: neck and shoulder pain is very common and has affected most of us, or someone we know, at some time or another. Most neck and shoulder pain stems from poor posture, prolonged screen time, stress, and deconditioning. It can also result from arthritis, disc issues, and pinched nerves. What follows will be looking at causes, characteristics and the role of physiotherapy for neck and shoulder pain.
Physiotherapy targets the root cause of discomfort, which can include poor posture, muscle imbalances, and joint stiffness through assessment, hands-on treatment, specific exercises, and education. A first physio appointment involves detailed history-taking, movement tests, initial treatment, and home exercises, with follow-up sessions progressing over 4–8 weeks.
Chin tucks and doorway pectoral stretches are two effective exercises you can safely try at home, provided you follow proper technique and safety guidelines.
Seek urgent medical help for severe trauma, progressive weakness, or systemic symptoms—but routine physiotherapy is appropriate for persistent pain lasting more than 10–14 days.
Understanding Neck and Shoulder Pain
Neck and shoulder pain affects millions of office workers, drivers, and manual workers. The cervical spine and shoulder girdle work together anatomically, which means problems in one area often create symptoms in the other.
Your neck comprises seven cervical vertebrae, intervertebral discs, facet joints, and multiple muscle groups including the upper trapezius, levator scapulae, deep neck flexors, and rotator cuff muscles. Nerves exit the cervical spine and travel down into the arm, which explains why neck problems sometimes cause arm symptoms.
Pain can be local (just neck or just shoulder), referred (felt in the shoulder but originating from cervical joints), or radicular (shooting pain with tingling or numbness from nerve compression). The good news: most non-traumatic neck and shoulder pain improves with targeted physiotherapy, movement, and lifestyle changes rather than rest alone.
Common Causes of Neck and Shoulder Pain
Causes are typically a combination of lifestyle factors, muscle imbalance, and age-related changes—not just a single “bad disc.” Understanding these causes helps physiotherapists develop targeted treatment plans.
The most frequent causes relevant to modern life include postural overload from laptops and phones, long commutes, manual handling, stress, and poor sleep positioning. During assessment, physiotherapists differentiate between muscular causes, joint or disc involvement, and nerve irritation to guide treatment.
Serious causes like fracture, infection, or inflammatory disease are rare but must be ruled out if red-flag symptoms are present, including fever, significant trauma, severe neck pain at night, unexplained weight loss, or progressive weakness.
Poor Posture and Ergonomics
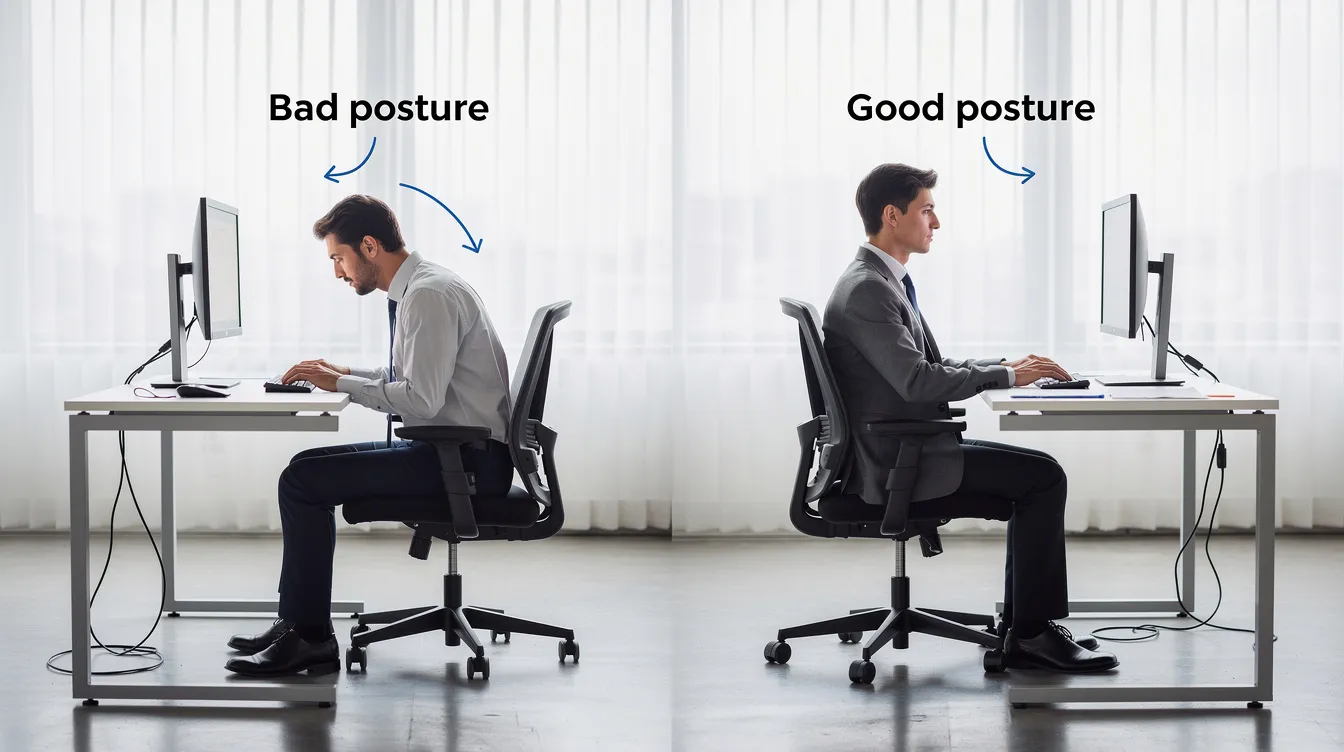
Poor posture and bad ergonomics can significantly impact musculoskeletal health, especially for those working long hours at computers or phones. Forward head posture and rounded shoulders increase load on the neck and upper back during 6–8 hour desk days.
Common scenarios include working on a laptop at the kitchen table, using dual monitors incorrectly, or spending hours looking down at a phone—often called “tech neck.” Poor posture and ergonomics, such as slouching while working at a computer, can significantly contribute to neck and shoulder pain by placing undue stress on the postural muscles.
Tight pectoral muscles, weak mid-back muscles, and underactive deep neck muscles create typical patterns that physiotherapists target. Maintaining proper posture involves keeping shoulders in line with hips, ears over shoulders, and feet flat on the floor, especially when sitting for long periods.
Muscle Strain, Overuse, and Injury
Neck and shoulder pain can be caused by muscle strain and injury, often resulting from overexertion or engaging in unfamiliar activities without proper conditioning. Sudden overload, like weekend sport, lifting boxes when moving house, or repetitive tasks such as stocking shelves, strains neck and shoulder muscles.
Symptoms of muscle strain include localised aching, stiffness, pain on certain movements, and protective spasm. Common gym issues include heavy overhead pressing, swimming with poor technique, or cycling with an aggressive posture that strains the upper body.
Most muscular strains respond well to learning better habits, manual therapy, and progressive strengthening exercises. An acute injury typically settles within weeks with appropriate management.
Arthritis, Disc Changes, and Degeneration
Medical conditions like arthritis, including osteoarthritis and rheumatoid arthritis, can lead to pain and stiffness in the neck and shoulder joints. Osteoarthritis in the neck (cervical spondylosis) involves age-related wear of cervical joints and discs, often seen from the 40s onwards.
Imaging often shows ‘wear and tear’, even in people without pain, so findings must be interpreted carefully. Disc bulges or herniated discs can cause local neck pain and, if contacting a nerve, arm pain, numbness, or weakness.
Physiotherapy can often manage symptoms effectively without surgery by improving mobility, muscle strength, and proper alignment. Treatment focuses on what you can control rather than scan findings.
Pinched Nerves and Referred Pain
Pinched nerves and herniated discs in the cervical spine can cause sharp or burning pain in the neck and shoulders, often radiating to other areas of the body. A “pinched nerve” (cervical radiculopathy) occurs when nerve roots are irritated or compressed, typically from disc or joint changes.
Typical symptoms include sharp, burning, or electric pain radiating into the shoulder, upper arms, or hand, along with pins and needles, possible weakness, or reduced reflexes. Referred pain from cervical joints or muscles may be felt in the shoulder blades or upper back but without numbness or true nerve signs.
Sudden severe weakness, loss of hand function, or problems with walking or bladder/bowel control warrant urgent medical assessment to prevent further injury.
Stress, Tension, and Lifestyle Factors
Stress can lead to muscle tension in the neck and shoulders, resulting in chronic pain and discomfort due to the body’s natural response to tighten up under pressure. Long work hours and poor sleep quality increase tension, especially in the upper trapezius and neck muscles.
Associated issues include tension headaches starting at the base of the skull and radiating to the forehead or eyes. These chronic neck problems often worsen during high-pressure periods like project deadlines.
Physiotherapy addresses both physical tension and lifestyle contributors through breathing strategies, pacing, and movement habits. Relaxation techniques and stress management are integral to treatment success.
Typical Symptoms of Neck and Shoulder Problems
Symptoms vary with the root cause, and accurate description helps the physiotherapist diagnose correctly.
Common neck symptoms include:
- Stiffness on turning
- Pain when looking up or down
- Local soreness and muscle knots
- A sore neck upon waking
- Headaches originating from the base of the skull
Common shoulder symptoms include:
- Shoulder pain on overhead lifting
- Difficulty reaching behind the back
- Pain lying on the affected side (left shoulder or right arm)
- Reduced range in the shoulder joint
Neurological symptoms like tingling, numbness, or weakness in the arm or hand should be discussed at your first physio visit. Red flag symptoms such as unrelenting night pain, significant trauma, systemic illness signs, require medical review before routine physiotherapy.
How Physiotherapy Helps Neck and Shoulder Pain
Modern physiotherapy uses evidence-based manual therapy, targeted exercise, and education to address both symptoms and underlying causes. Physiotherapy offers a drug-free alternative for managing pain, reducing reliance on medication and invasive treatments.
Treatment is individualised: what’s prescribed for an office worker with postural pain differs from a swimmer with shoulder impingement or a 60-year-old with arthritis. Effective physiotherapy for neck and shoulder pain involves targeted exercises, manual therapy, and postural correction.
Most patients notice change within 2–4 sessions, although chronic conditions may take several weeks. Active participation, including doing home exercises and modifying habits, is crucial for lasting improvement.
Assessment and Diagnosis at the Initial Appointment
A first appointment typically lasts 40–60 minutes. The physiotherapist takes a detailed history covering onset, triggers, work demands, sport, and medical background, followed by a thorough physical exam.
Key tests include:
- Observation of posture and proper alignment
- Range of motion testing of neck and shoulder
- Palpation of muscle groups and joints
- Strength tests
- Basic neurological screening (reflexes, sensation)
The physio then explains the likely diagnosis in plain language—postural neck pain, rotator cuff-related shoulder pain, or cervical radiculopathy—and answers questions. Imaging is only recommended when necessary and usually arranged via a healthcare professional or specialist.

What Ongoing Physiotherapy Appointments Involve
Follow-up sessions focus on reassessing progress, adjusting exercises, and delivering targeted hands-on treatment.
A typical treatment plan over 4–8 weeks includes:
- Initial pain reduction and mobility work
- Progressive strengthening and functional training
- Sport or work specific drills as needed
The physiotherapist progressively “loads” the neck and shoulder with more challenging exercises as pain settles. Outcome measures like pain levels and range of motion monitor improvement session to session.
Manual Therapy Techniques
Manual therapy techniques, such as massage, mobilisation, and manipulation, are commonly used by physiotherapists to improve movement, reduce stiffness, and alleviate pain in patients with neck and shoulder pain. These hands on techniques include soft-tissue massage, joint mobilisation of the cervical spine and thoracic extension work, and gentle stretching.
Manual therapy provides immediate relief, while long term recovery relies on consistent active rehabilitation including exercise therapy. Specific areas often treated include the upper trapezius, levator scapulae, pectoral muscles, cervical facet joints, and thoracic spine.
Upper trapezius and levator scapulae stretches are used to release tension in the neck. Dry needling is a physiotherapy technique sometimes used that involves inserting fine needles into specific points to relieve pain and muscle tension, particularly in tight neck and shoulder areas.
Therapeutic Exercise and Strengthening
Exercise therapy is the core of long-term management, aiming to restore mobility, muscle strength, endurance, and postural control. Exercise therapy includes stretching, strengthening, and mobility drills to improve function and prevent recurrence of neck and shoulder pain.
General categories include:
- Mobility exercises for neck and upper back
- Scapular stability work (shoulder blade squeezes)
- Rotator cuff strengthening
- Deep neck flexor training
Strengthening focuses on deep neck flexors and scapular stabilisers to support the spine and shoulder joints. Physiotherapy treatments often include personalised exercise programs designed to strengthen and stretch the muscles around the neck and shoulders, improve flexibility, and increase range of motion.
Exercises are prescribed with specific sets, reps, and frequency: for example, 10 repetitions, 3 times per day, and progressed over time. Programs are customised for desk work, childcare, manual labour, or specific sports.
Pain Management and Adjunct Techniques
Other tools a physiotherapist might use include:
- Heat or cold therapy
- Gentle traction
- Taping or bracing
- Trigger point release
Cold therapy is recommended for immediate pain relief after an injury, while heat therapy is more effective for chronic pain, helping to increase blood flow and soothe discomfort in the neck and shoulder regions. Heat therapy is used to soothe chronic stiffness, while cold therapy helps reduce inflammation after acute injuries.
Advice around pacing activities, using pain relief medications under medical guidance, and sleep positioning strategies supports recovery. The goal is to keep people moving within tolerable pain levels rather than enforcing strict rest. This helps reduce pain and reduce stiffness over time.
What to Expect from Physiotherapy Appointments
Understanding the time commitment and process helps you prepare. The process is collaborative: the physiotherapist explains options and your goals such as sleeping pain free, returning to the gym and lifting children, shape the plan. Hands on treatment and exercises are adapted to tolerate mild discomfort but should not worsen symptoms significantly; adjustments are made if they do.
The First Few Weeks
Early sessions focus on reducing pain and restoring basic movement through gentle manual therapy, simple postural corrections, and low-load exercises.
The physiotherapist provides a small, manageable home program—2–3 exercises taking 5–10 minutes, done once or twice daily. Lifestyle advice is introduced early: quick desk adjustments, planned movement breaks, and basic stress-management techniques.
If symptoms don’t change or worsen, the physiotherapist reassesses and may consider referral for medical review or imaging.
Subsequent Weeks
As pain settles, treatment shifts towards building strength and resilience in the neck, shoulders, and upper back. Progression includes resistance band work, light weights, body weight exercises like wall push ups, wall angels, rows, and scapular control drills.
For athletes or heavy manual workers, sport-specific or job specific drills are introduced, such as overhead loading, throwing mechanics, or lifting technique coaching. Towards the end of rehab, emphasis shifts to independence: refining a long term routine and knowing how to respond if symptoms flare again.
Two Useful Exercises and Stretches for Neck and Shoulder Pain
Safety note: These exercises are general recommendations and should be pain free or cause only mild discomfort. Anyone with severe neck pain or radiating symptoms should seek professional assessment first.
Perform movements slowly, avoid bouncing, and stop if symptoms significantly worsen, cause dizziness, or produce new numbness or weakness. Consistency matters: small daily practice often beats occasional long sessions.
Exercise 1: Chin Tucks (Deep Neck Flexor Activation)
Chin tucks are effective for correcting forward head posture and strengthening the deep neck flexors, which can alleviate neck strain.
Step-by-step instructions:
- Sit tall with your back against a chair, feet flat on the floor in your starting position
- Keep your eyes level and shoulders relaxed
- Gently pull your chin straight back, creating a “double chin” without tilting your head up or down
- Hold for a few seconds (3–5 seconds)
- Slowly return to neutral and relax
8–10 repetitions, 2–3 times daily
Tips: Movement should be small—mild muscular effort or stretch at the base of the skull is fine, but sharp pain is not. Keep your arms forward and relaxed throughout. This helps relieve neck pain by improving posture and strengthening the cervical joints.

Exercise 2: Doorway Pectoral Stretch (Chest and Shoulder Mobility)
This shoulder stretch addresses tight chest muscles that pull shoulders forward, increasing load on the neck and mid-back. It’s an effective way to relieve pain and improve good posture.
Setup:
- Stand tall in a door frame with elbows bent to approximately 90 degrees at shoulder height
- Place forearms on the door frame
- Position one foot slightly ahead for balance
Execution:
- Lean forward gently, shifting body weight toward the doorframe
- Feel the stretch across the front of shoulders and chest
- Keep your neck relaxed—don’t lean forward with your head
- Avoid excessive arching of the lower back
Hold for 20–30 seconds, repeat 2–3 times, once or twice daily
This stretch helps release tension in tight pectoral muscles and supports improving posture. If you feel pain in the shoulder joint itself rather than a chest stretch, ease off or try the opposite side.
Preventing Future Neck and Shoulder Pain
Prevention focuses on posture, regular movement, strength training, and stress management rather than complex routines. An ergonomically designed workspace can help alleviate and prevent neck and shoulder pain by ensuring proper alignment and reducing strain on muscles.
Encourage practical changes you can implement in a single afternoon. General physical activity, approximately 150 minutes of moderate exercise per week, keeps muscles and joints healthy. A physiotherapist can design a personalised maintenance program once acute pain resolves.
Workstation and “Tech” Adjustments
| Element | Recommendation |
|---|---|
| Monitor | Eye level, arm’s length away |
| Keyboard/Mouse | Close to body, elbows at 90° |
| Chair | Back supported, feet flat on floor |
| Laptop | Use separate keyboard; raise screen on stand |
Set reminders every 45–60 minutes to stand, walk briefly, and perform mobility exercises like shoulder rolls or arm circles in a circular motion. You might also do small circles with your upper arms or slowly roll your neck through gentle ranges.
Hold phones at eye level and limit long sessions of scrolling with neck bent forward to prevent pain and maintain good posture.
Daily Movement, Strength, and Stress Management
Incorporate a short daily routine of 5–10 minutes including:
- Neck mobility drills
- Shoulder blade squeezes to strengthen rhomboids and mid-trapezius
- Isometric neck exercises build strength safely without joint movement, making them ideal for early-stage rehabilitation or sensitive necks
- Thoracic extension work
Activities like swimming, yoga, Pilates, or brisk walking improve posture, strength, and blood flow. Customised movement programs and ergonomic advice are essential for long term recovery and prevention in physiotherapy.
Simple stress reduction tools include diaphragmatic breathing, brief mindfulness sessions, regular sleep schedules, and boundaries around work emails. People with recurrent pain may benefit from periodic physiotherapy “check ups” every few months to prevent pain from returning.
When to Seek Physiotherapy or Medical Help
Persistent pain lasting more than 1–2 weeks, recurring flare-ups, or pain interfering with sleep, work, or sport justify a physiotherapy assessment. Early physiotherapy input is recommended for new shoulder pain with overhead work, neck stiffness after a minor car accident, or gradually worsening desk related pain.
Don’t wait months hoping chronic pain will disappear. Early intervention typically leads to faster recovery and fewer chronic issues.
Signs You Should See a Physiotherapist Soon
- Persistent neck or shoulder pain for more than 10–14 days despite simple self care
- Recurrent, predictable pain after certain tasks that is gradually worsening
- Stiffness or loss of range affecting driving, dressing, or sleeping
- Previous episodes that improved with therapy but have recently returned
Red Flags: When to Seek Urgent Medical Attention
- Sudden onset of severe neck pain after significant trauma or inability to move the neck
- Progressive arm or hand weakness, coordination problems, difficulty walking, or bladder/bowel control issues
- Unexplained weight loss, fever, night sweats, history of cancer, or constant night pain unrelieved by position change
- Severe headache with neck stiffness, visual changes, confusion, or neurological symptoms requiring emergency review
If you or someone you care about is suffering from neck or shoulder pain, don’t wait. You can call us at West Pennant Hills Physiotherapy and Sports Injuries Centre on 0298753760, or you can just book online.
FAQ’s
How long does it usually take for physiotherapy to improve neck and shoulder pain?
Many mild to moderate cases improve noticeably within 2–4 sessions (about 2–4 weeks of consistent treatment with home exercise adherence). Longer, or more complex problems, including chronic neck conditions, can take 6–12 weeks. Timelines vary with general health, job demands, exercise adherence, and whether there’s nerve involvement or arthritis. Your physiotherapist will review progress regularly and adjust the plan if improvement is slower than expected.
Do I need a scan (X-ray or MRI) before seeing a physiotherapist?
Most people with neck and shoulder pain don’t need imaging before starting physiotherapy. Guidelines recommend clinical assessment first. Many scan findings, like mild disc bulges or ‘wear and tear’, are common in people without pain and don’t always explain symptoms. If the physiotherapist suspects something serious or symptoms fail to improve, they’ll work with your GP to arrange appropriate imaging.
Is it safe to exercise when my neck or shoulder is still painful?
In many non serious cases, it’s safe and beneficial to do gentle, guided exercises even when some pain is present, as long as it stays within tolerable limits. Acceptable discomfort is mild and settles quickly after exercise. Warning signs requiring modification include sharp or worsening pain, or increased numbness/weakness. Your physiotherapist tailors exercises and progressions to ensure safety for your specific condition.
Can physiotherapy help if I have arthritis in my neck or shoulder?
Physiotherapy is often very helpful for osteoarthritis by improving joint mobility, strengthening supporting muscles, and teaching joint friendly movement patterns. While physiotherapy cannot reverse cartilage wear, it can significantly reduce pain and stiffness, and improve function and quality of life. Treatment may also include advice on pacing, weight management, and appropriate general exercise.
What should I wear and bring to my first physiotherapy appointment?
Wear comfortable clothing allowing easy access to neck and shoulders—a singlet top or T-shirt works well. Avoid restrictive collars or heavy jewellery. Bring any relevant medical reports or scans, a list of current medications, and notes about previous treatments. Writing down key questions beforehand helps you make the most of your assessment and goal-setting conversation.
When you suffer an injury, the first question on your mind is usually: “How long until I feel normal again?” It is a natural response. You want to get back to your sport, your job, or simply your daily routine without pain.
Navigating recovery requires patience and a good understanding of what your body needs. While we can provide average timelines for common injuries, your healing journey is uniquely yours.
In this guide, we will break down some of the most frequent issues we see in physiotherapy. We will explore what causes them and provide general estimates for how long they take to heal. You will learn why recovery varies from person to person and what you can do to support your body along the way.
Why Every Recovery Timeline is Different
Before we look at specific numbers, we must establish a crucial ground rule. The timelines below are strictly general estimates. You cannot set your watch by them.
Your body heals at its own pace. Several key factors influence how quickly you recover:
- Severity of the injury: A mild muscle strain will heal much faster than a complete tear or a complex joint issue. We often grade injuries (like sprains) to better understand the damage.
- Your overall health: Your age, diet, sleep habits, and pre-existing medical conditions play massive roles in tissue repair. A healthy immune system and good blood flow speed up the healing process.
- Adherence to treatment plans: Doing your prescribed physiotherapy exercises matters. Patients who consistently follow their rehab plan, avoid aggravating activities, and attend their sessions usually see faster, more sustainable results.
Keep these variables in mind as you read through the following injury estimates.
Sprained Ankles
Ankle sprains happen when you twist, roll, or turn your ankle in an awkward way. This movement stretches or tears the tough bands of tissue (ligaments) that help hold your ankle bones together.
Physiotherapists categorise ankle sprains into three grades based on severity.
Grade 1 (Mild)
A Grade 1 sprain involves slight stretching and microscopic tearing of the ligament fibers. You will likely experience mild tenderness and swelling around the ankle.
Estimated recovery time: 1 to 3 weeks.
Grade 2 (Moderate)
This grade indicates a partial tear of the ligament. You will notice moderate tenderness, swelling, and possibly some bruising. Moving your ankle will be painful, and putting weight on your foot might be difficult.
Estimated recovery time: 3 to 6 weeks.
Grade 3 (Severe)
A Grade 3 sprain is a complete tear of the ligament. You will experience significant swelling, severe bruising, and instability in the joint. You will not be able to bear weight on the affected foot.
Estimated recovery time: Several months. You may need a walking boot or, in rare cases, surgical intervention.
Rotator Cuff Injuries
Your rotator cuff is a group of four muscles and tendons that stabilize your shoulder joint and allow you to lift and rotate your arm. You can injure this area through a sudden trauma, like falling on an outstretched hand, or through repetitive overhead motions.
Symptoms usually include a dull ache deep in the shoulder, weakness in your arm, and difficulty reaching behind your back.
Mild Strains and Tendinitis
If you simply overwork the tendons, causing inflammation without tearing, you have tendinitis. Rest, ice, and targeted physical therapy exercises usually resolve the issue effectively.
Estimated recovery time: 2 to 4 weeks.
Partial or Complete Tears
Tears take much longer to heal. A partial tear means the tendon is damaged but not completely severed. A complete tear pulls the tendon off the bone.
Estimated recovery time: 4 to 6 months. If your tear requires surgery, your total recovery time—including post-operative physiotherapy—can extend up to a full year before you regain maximum strength and range of motion.
Lower Back Pain
Lower back pain is incredibly common. Almost everyone experiences it at some point in their lives. The causes range from heavy lifting and poor posture to herniated discs and arthritis.
Because the lower back is a complex structure of interconnected bones, joints, nerves, ligaments, and muscles, recovery times vary wildly.
Acute Lower Back Pain
Most lower back pain is acute. This means it comes on suddenly and lasts for a short time. You might wake up with a stiff back or feel a tweak after moving a heavy box.
Estimated recovery time: 1 to 4 weeks. Staying lightly active, applying heat or ice, and performing gentle stretches recommended by a physiotherapist usually clear up acute pain quickly.
Chronic Lower Back Pain
If your back pain lasts for more than 12 weeks, we classify it as chronic. Chronic pain often requires a more comprehensive approach. You may need to address underlying core weakness, poor movement patterns, or specific structural issues like sciatica.
Estimated recovery time: Ongoing. Treating chronic back pain is often about management and steady improvement over several months rather than a quick fix.
Tennis Elbow (Lateral Epicondylitis)
You do not need to play tennis to get tennis elbow. This condition involves inflammation or microscopic tearing of the tendons that join the forearm muscles on the outside of the elbow. The forearm muscles and tendons become damaged from overuse.
Repeating the same motions again and again leads to pain and tenderness on the outside of your elbow. Plumbers, painters, carpenters, and office workers who type extensively often develop this issue.
Estimated recovery time: 6 to 12 months. Tendons have a notoriously poor blood supply compared to muscles. This lack of blood flow means they heal slowly. Physiotherapy focuses on modifying your activities, bracing the area, and eccentric strengthening exercises to rebuild the tendon tissue.
Plantar Fasciitis
Plantar fasciitis is one of the most common causes of heel pain. It involves inflammation of a thick band of tissue that runs across the bottom of your foot and connects your heel bone to your toes.
You usually feel a sharp, stabbing pain with your first steps in the morning. As you move more, the pain normally decreases, but it might return after long periods of standing or when you stand up after sitting. Runners, people who are overweight, and those who wear shoes with inadequate support have a higher risk of developing this condition.
Estimated recovery time: 6 to 12 months. Similar to tennis elbow, the fascia takes a long time to heal. Your physiotherapy plan will likely include stretching the calves and the plantar fascia, strengthening the lower leg muscles, and possibly discussing orthotics for your shoes.
Runner’s Knee (Patellofemoral Pain Syndrome)
Runner’s knee describes pain around the front of your knee and kneecap. It happens when the kneecap rubs against the groove of the thigh bone. Overuse, poor foot support, and weak thigh or hip muscles all contribute to this painful friction.
You will notice it most when climbing stairs, squatting, or sitting with bent knees for a long time.
Estimated recovery time: 4 to 6 weeks. Recovery primarily involves resting from the activity that causes the pain. A physiotherapist will guide you through exercises to strengthen your quadriceps, hamstrings, and hip abductors. Strengthening these surrounding muscles helps keep your kneecap properly aligned.
How to Support Your Healing Process
While you cannot rush biology, you can create the best possible environment for your body to heal. Here are a few ways to support your recovery:
- Listen to your body: Pain is a warning signal. Pushing through sharp pain usually causes more damage.
- Prioritize sleep: Your body does the majority of its tissue repair while you sleep. Aim for eight hours of quality rest each night.
- Stay hydrated and eat well: Protein helps rebuild muscle and tendon tissue. Drinking plenty of water keeps your joints lubricated and helps deliver nutrients to the injury site.
- Do your homework: Your physiotherapist will give you exercises to do at home. These exercises are the most important part of your recovery. Do them exactly as instructed.
Take the Next Step Toward Recovery
Reading about average timelines can give you a rough idea of what to expect, but nothing replaces professional guidance. Trying to diagnose and treat your own injury often leads to prolonged pain and frustration.
A qualified physiotherapist will assess your specific injury, evaluate your movement patterns, and build a customized treatment plan designed for your body. They will monitor your progress and adjust your exercises as you get stronger.
Stop guessing about your recovery timeline. Reach out to a local physiotherapy clinic today to schedule an assessment. Taking that first step ensures you get the right advice, the right treatment, and a safe return to the activities you love.
For more information on these and other conditions and injuries, you can check out our Resources page and look for the blog that best suits.
If you or someone you care about is suffering from these or other conditions or injuries, you can call us on 0298753760, or you can just book online.

Aches and pains are a common part of life, whether from a tough workout, long hours at a desk, or just everyday stress. While a professional massage is a great treat, it isn’t always practical or affordable. Fortunately, a wide range of self massage tools can provide effective relief right from the comfort of your home.
The market for these tools is vast, with each product offering unique strengths. Finding the right one depends entirely on you. This guide will help you navigate the options, understand what to look for, and choose the perfect tool to meet your specific needs.
Before You Buy: What Do You Really Need?
To find the best self-massage tool, you first need to understand your own body and lifestyle. Jumping on the latest trend might leave you with an expensive gadget that gathers dust. Instead, take a moment to reflect on what you hope to achieve.
Consider these factors:
- Target Area: Are you dealing with a tight back, sore legs, or neck tension? Some tools are designed for large muscle groups, while others excel at pinpointing small, specific knots.
- Portability: Do you need a tool you can toss in a gym bag or take to the office? Or will you primarily use it at home? Size and weight are important considerations.
- Ease of Use: Some tools require more physical effort than others. Think about whether you prefer an electronic device that does the work for you or a manual tool that gives you complete control over pressure.
- Budget: Prices can range from under twenty dollars to several hundred. Setting a budget beforehand can help you narrow down the options and find a quality tool without overspending.
- Intensity: Do you need deep, intense pressure to work out stubborn knots, or are you looking for a gentler, more relaxing massage?
Popular Self-Massage Tools and Their Uses
Once you have a clearer idea of your needs, you can explore the different categories of massage tools. Here are some of the most popular options, along with their benefits and ideal use cases.
Foam Rollers: The Versatile Classic
Foam rollers are simple yet highly effective tools for targeting large muscle groups. By using your body weight to roll over the cylinder, you can release tension in your quads, hamstrings, glutes, and back. They are a staple for athletes and fitness enthusiasts for warming up muscles and aiding recovery.
- Best for: Releasing tightness in large muscle groups like legs, glutes, and back. Improving flexibility and circulation.
- Types: Come in various densities, from soft for beginners to firm for deeper pressure. Some have textured surfaces with ridges and knobs to mimic a massage therapist’s hands.
- Consider: A standard, smooth foam roller is a great starting point. If you find you need more intensity, you can graduate to a denser or textured model.
Massage Guns: Powerful Percussive Therapy
Massage guns have surged in popularity for a reason. These powerful handheld devices use rapid percussive therapy to deliver deep, concentrated pulses into your muscle tissue. This action helps release knots, break up scar tissue, and relieve soreness quickly. Most come with interchangeable heads designed for different muscle groups and effects.
- Best for: Deep tissue relief, targeting specific sore spots, and speeding up muscle recovery after intense exercise.
- Types: Models vary in power (measured in amplitude and percussions per minute), battery life, and noise level. Mini massage guns offer great portability.
- Consider: If you’re a serious athlete or regularly experience deep muscle knots, a massage gun can be a worthwhile investment. Look for one with multiple speed settings and attachments for versatility.
Handheld Massagers: Control and Convenience
This broad category includes everything from simple massage canes and balls to electronic shiatsu massagers. What they have in common is their handheld design, which gives you direct control over placement and pressure.
- Massage Canes: These S-shaped tools are brilliant for reaching awkward spots on your back, neck, and shoulders. The simple hook design lets you apply precise pressure to trigger points without straining.
- Massage Balls: Perfect for pinpoint accuracy. A simple lacrosse or tennis ball can work wonders on knots in your glutes, shoulders, or the arches of your feet. Spiky balls add an extra layer of sensory stimulation.
- Electronic Handhelds: These devices often feature rotating nodes, heat, and vibration. They are excellent for a relaxing massage on easily accessible areas like your neck, shoulders, and lower back.
- Best for: Targeting hard-to-reach areas (canes), pinpointing specific knots (balls), and convenient, relaxing massage (electronic devices).
- Consider: A massage cane is an inexpensive and highly effective tool for back and shoulder pain. Massage balls are incredibly versatile and portable.

Lezer Trigger Massage Point
If you’re seeking targeted muscle relief, consider a multi-angle deep tissue massage tool designed for versatility and effectiveness. This tool is highly effective for relieving muscle knots, tightness, and soreness across the head, neck, shoulders, back, spine, arms, thighs, and even heel pain, including plantar fasciitis. It enables myofascial release and comprehensive muscle relief for your entire body. This helps you save both time and money by serving as your own personal massager.
With three different angled tips, you can customize the pressure and approach to specific areas. It makes it easy to target soreness exactly where you need it most. Unlike typical massage balls, this tool offers precise, point-to-point deep tissue release right at the source of discomfort. Its ergonomic design (measuring 2.9in x 2.1in) provides the right size and firmness, making it comfortable and easy to grip for users of all ages.
Whether you want to massage your temples, neck, arms, or legs, you can hold the tool directly, use it against a wall to relieve your back, or even place it on a chair or the floor to target your thighs and feet. Thanks to its stable base and durable material, it stays in place during use for effective results anywhere you need relief.
Crafted from premium TPR rubber material, this massage tool combines the ideal level of firmness with user comfort. Its non-irritating, hypoallergenic construction is safe for all skin types, and it can be easily cleaned with water. The Taiwanese-made quality ensures long-lasting durability, making it a reliable addition to your self-care routine.
Lightweight and compact, this massager fits in any bag or small luggage, so you can take it to the office, gym, or even on vacation. It’s not only a practical solution for daily muscle recovery but also a thoughtful wellness gift for family and friends seeking a healthier lifestyle.

5Billion Peanut Massage Ball
The 5Billion Peanut Massage Ball is designed for myofascial release and targeting hard-to-reach stabilising muscles along the spine and vertebrae—without putting excess pressure on your bones. Its split peanut shape (5″ length, 2.5″ diameter) and ideal 12oz weight allow for focused, deep tissue massage, making it suitable for neck, back, shoulder, legs, feet, and plantar fasciitis relief.
Built for durability, the massage ball is made from 100% natural rubber. It is firm yet forgiving, unlike hard plastic balls that can feel too harsh. It’s tough enough for long-lasting use and maintains consistent firmness across all four colour choices.
This portable self-massage tool includes a free carry bag, so you can enjoy pain relief and muscle recovery at the gym, in the office, or while traveling. It’s easy to use for pre-workout warmups, post-workout recovery, or daily tension release wherever you are.
Each peanut roller comes with a workout guide for safe and effective use. Whether you need targeted trigger point massage, want to increase mobility, or strengthen your core, the 5Billion Peanut Massage Ball makes self-care easy.

Cotsoco Massage Gun
The Cotsoco Massage Gun is designed to effectively relieve muscle fatigue and deep tissue pain, making it an ideal choice for athletes and anyone seeking a comfortable, professional-grade massage experience.
With 9 interchangeable heads, this massage gun targets specific muscle groups to promote faster recovery and enhance flexibility. The quick-release design allows you to easily swap out massage heads in seconds, ensuring convenience and efficiency. Offering 20 adjustable speed levels that go up to 3200 RPM, the Cotsoco Massage Gun allows you to customise the vibration intensity to perfectly suit your needs, delivering a tailored and soothing massage every time.
Equipped with a powerful 2000mAh lithium battery, this deep tissue massage gun can operate continuously for up to 6 hours, thanks to its brushless high-torque motor.
The USB Type-C fast charging compatibility ensures you can charge the device anywhere, providing ultimate portability. Featuring advanced noise reduction technology, the massager operates at less than 40dB, allowing for a quiet and relaxing massage experience.
Additionally, its ergonomic, non-slip design ensures a comfortable grip, making it effortless to use. For added safety, the Cotsoco Massage Gun includes an automatic shut-off feature after 10 minutes of continuous use, preventing overheating and extending battery life.
Whether you’re recovering post-workout or looking to ease daily tension, the Cotsoco Massage Gun delivers premium performance with unmatched convenience.

Abnaok Manual Massage Three Pack
These massaging tools are designed with a lightweight and compact structure, making them ideal for both travel and everyday home use. Their portability ensures you can enjoy a relaxing massage experience wherever you go, whether at the gym, office, or on vacation.
Crafted from durable hard plastic, these tools are built to withstand varying levels of pressure without compromising on quality. The durable design ensures long-lasting reliability, even with consistent use, offering exceptional performance for deep tissue massages.
Designed with comfort in mind, these massagers feature an easy-to-grip design that allows for precise control. This ensures you can apply the perfect amount of pressure with minimal effort, delivering an effective deep tissue and trigger point massage while protecting your finger joints and skin from sprains and friction.
These manual massagers are suitable for targeting deep tissue trigger points on your neck, back, legs, hands, and more. They relieve muscle pain, releasing tension, and promote relaxation after a long day or rigorous workout.
The package includes a thumb-shaped massager, a trigger point pressure massager, and a 3-legged massage knob. This versatile set is perfect for both self-massage and using on others, providing a well-rounded solution for muscle relief and relaxation.

Therapists Choice 2 Pack Spiky Massage Balls
Contains 2 Massage Balls: This set includes 1 green 3.75″ soft spiky massage ball and 1 red 3.00″ hard spiky massage ball, designed to cater to various massage needs.
These massage balls are good tools for relieving plantar fasciitis and enhancing foot massages, providing targeted relief to sore and tight muscles.
The spiky outer layer delivers a stimulating massage effect, helping to increase blood circulation and promote relaxation.
Made from high-quality, phthalate-free PVC, these durable and skin-safe massage balls are perfect for improving mobility and reducing muscle tension.

Joinfitpro 3 Piece Massage Ball Set
The 3-in-1 Massage Ball Set is designed to rejuvenate your body, relieve muscle tension, and enhance overall well-being. Great for athletes, desk workers, or anyone seeking an effective solution for daily stress and muscle recovery. This kit is your gateway to comfort and relaxation like never before.
Unlock the power of self-massage therapy with this versatile set, crafted to target muscle knots, promote trigger point relief, and reduce tension all over your body. Whether you’re combating plantar fasciitis, easing tightness in your neck, or soothing soreness in your legs, our Massage Balls deliver pinpoint accuracy and effective results. Each ball is ergonomically designed to offer precision and control, allowing you to reach even the hardest-to-access areas with ease.
Prioritise your self-care and enjoy the unparalleled benefits of this all-in-one solution. Made from high-quality, non-toxic materials, our Massage Ball Set is built for exceptional durability and long-term use, ensuring you have a reliable tool for your recovery and relaxation needs. Feel the difference as you release built-up stress, enhance blood circulation, and promote natural muscle recovery.
From targeting deep tissue tension to addressing discomfort caused by prolonged sitting or strenuous physical activity, this comprehensive Trigger Point Release Kit ensures you’re always ready to live an active, pain-free lifestyle. Take charge of your well-being today and discover how effective self-care can redefine your comfort, energy, and vitality.
Making the Right Choice for Your Lifestyle
Choosing the best self-massage tool is a personal decision. There’s no single “best” option—only the one that is best for you.
To make an informed choice, start by identifying your primary goal. Are you looking to enhance athletic recovery, relieve desk-related tension, or simply unwind at the end of the day?
If you’re a runner, a foam roller is an essential piece of gear. If you spend all day hunched over a computer, a massage cane or an electronic neck massager might be your savior. For the gym-goer who pushes their limits, a massage gun could be a game-changer.
Don’t be afraid to start simple. A basic foam roller or massage ball can provide significant relief and help you learn more about what your body responds to. As you become more familiar with self-massage techniques, you can explore more specialized or powerful tools. By aligning your choice with your needs, budget, and lifestyle, you’ll find a tool that becomes a valuable part of your wellness routine.
If you are feeling your aches and pains, and think that self massage won’t do the trick, you could always come in and see one of our therapists. It’s as easy as calling us on 0298753760, or you can book online.
This post contains affiliate links and I may earn a small commission when you click on the links at no extra cost to you. As an Amazon Affiliate I earn from qualifying purchases.
What are Shin Splints?
Shin splints, also termed Medial Tibial Stress Syndrome (MTSS), is a common overuse injury characterised by pain on the inside of your shin bone (tibia). The exact mechanism of Shin Splints includes repetitive stress to the fibrous layer of the shin bone (tibial periosteum) and surrounding soft tissues due to excessive or repetitive loading.
Risk factors such as flatfeet, high arch, muscle imbalances, and poor shock absorption may be causes of shin splints.
Shin splints primarily affect the inside of the shin bone. The muscles of the back of the lower leg (e.g., tibialis posterior, soleus) insert into the fibrous layer of the shin. The layer becomes inflamed and irritated due to repetitive stress, leading to shin pain and discomfort.
Who is at risk?
Shin splints are prevalent among athletes, especially runners, dancers, and military personnel.
It accounts for approximately 13-20% of all running-related injuries and affects individuals of all ages and activity levels.
Wearing unsupportive shoes with inadequate arch support will increase the likelihood of developing shin splints as well.
How do I know if I have shin splints (Medial Tibial Stress Syndrome)?
Having shin splints diagnosed requires a primarily clinical approach based on the patient’s history and physical examination.
Symptoms of shin splints include pain along the inside of the shin bone. It typically worsens with activity and improves with rest.
X-rays and MRI may be used to rule out other conditions such as stress fractures or compartment syndrome.
Prognosis
With appropriate management, the prognosis for shin splints is generally favourable. Most cases resolve with conservative treatment measures. Recovery time may vary depending on the severity of the condition and the individual’s response to treatment.
In general, mild cases of shin splints may resolve within a few weeks with proper rest, ice, and over-the-counter pain medications.
However, more severe cases may take several weeks to months of having shin splints treated to fully recover.
RICE principle
One effective nonsurgical treatment for shin splints is adhering to the RICE principle. This is an acronym that stands for Rest, Ice, Compression, and Elevation. This method is particularly beneficial during the initial phase of injury when the pain is most acute.
Rest
It’s important to take a break from activities that worsen the pain of shin splints. This means avoiding high-impact exercises like running or jumping until the pain subsides.
Ice
Applying ice to the affected area helps reduce inflammation and shin pain. An ice pack wrapped in a cloth could be applied to the shin for about 15-20 minutes several times a day, especially after activities that may exacerbate the symptoms.
Compression
Compression bandages or sleeves can help reduce swelling and provide support to the shin muscles. To avoid cutting off circulation, wraps are not to be done too tightly.
Elevation
Elevating the affected leg can also help reduce mild swelling. When resting, try to keep the leg elevated above the level of your heart, such as by propping it up with pillows.
This conservative treatment approach, when applied promptly and correctly, can significantly relieve pain and expedite the healing process for those suffering from shin splints.
Stretching and strengthening exercises
Targeted exercises to improve flexibility, strength, and muscle balance in the lower limb could be prescribed. These improve the condition with the focus on the lower leg muscles and intrinsic foot muscles.
Calf Stretch
Stand facing a wall with your hands against it. Step one foot back and keep it straight, pressing the heel into the ground. Bend the front knee and lean forward until you feel a stretch in the calf of the back leg. Hold for 30 sec to 1 min as tolerated and switch sides.
Towel Stretch
Sit on the floor with your leg extended in front of you. Loop a towel around the ball of one foot and gently pull it towards you until you feel a stretch in your calf. Hold for 30 sec to 1 min as tolerated and switch sides.
Toe Raises
Stand with your feet hip-width apart. Slowly raise your toes up as high as you can while keeping your heels on the ground. Hold for a few seconds, then lower your toes back down. Repeat for 2-3 sets of 10-15 repetitions.
Resistance Band Exercises
Use a resistance band to perform exercises that target the muscles of the lower leg, such as dorsiflexion (lifting off brake) and plantarflexion (stepping on gas) exercises. This helps improve strength and stability in the muscles surrounding the shin.
Biomechanical assessment
Evaluation of gait and lower limb mechanics by physiotherapists to identify and address any underlying biomechanical abnormalities contributing to shin splints (Medial Tibial Stress Syndrome).
Orthotic intervention
Orthotics are specialised devices designed to correct foot posture and distribute pressure more evenly across the foot. This can significantly alleviate the discomfort associated with shin splints. These devices range from over-the-counter insoles to custom-made orthotics prescribed by healthcare professionals.
The goal of orthotic intervention is not only to provide cushioning and support but also to address any structural abnormalities. These include overpronation or supination, that can exacerbate the symptoms.
By improving alignment and function of the foot and ankle, wearing supportive shoes, orthotics and shoe inserts can decrease the repetitive stress placed on the tibia. This reduces the inflammation and pain caused by shin splints.
You could be an athlete looking to enhance your performance without pain or someone who experiences shin splints through daily activities. By incorporating the right orthotic and supportive shoes can be a game-changer in managing this condition effectively.
Gradual return to activity
After employing conservative measures like the RICE protocol and strength exercises to prevent shin splints, a planned gradual return to activity is paramount to avoid re-injury.
This phased approach ensures that the muscles and tendons of the lower leg have sufficiently healed and strengthened, thereby minimising the risk of shin splints recurring.
Begin with low-impact activities such as walking or cycling, and gradually increase the intensity and duration of exercise. This allows the body to adapt without overwhelming the recovering tissues.
Monitoring shin pain levels and adjusting activities accordingly serves as a guide for progression.
This methodical progression aids in complete recovery. It also enhances the resilience of the lower legs against future injuries. Learning the best ways prevent shin splints recurring is also an important part of becoming pain free.
It is crucial for individuals to listen to their bodies and consult with healthcare professionals. They tailor a return-to-activity plan that aligns with their recovery status and fitness goals.
FAQ’s
Is walking good for shin splints (Medial Tibial Stress Syndrome)?
To avoid shin splints, it’s sensible to temporarily stop any lower leg exercises that could worsen the condition, for about one to two weeks. During this period, limit your physical activity to daily routine walking.
Engage in alternative low-impact exercises that don’t make you feel pain, like swimming, using an elliptical trainer, or cycling.
Incorporating these activities can help maintain fitness levels without putting additional stress on your shins.
Why do people get shin splints?
Shin splints are primarily caused by vigorous physical activities. These include intense workouts, competitive sports, or any form of repetitive exertion that puts stress on the lower legs.
Such activities can provoke inflammation in the muscle tissues, tendons, and the periosteum, which is the thin sheath surrounding the tibia. This inflammation is a key contributor to the discomfort and pain commonly associated with developing shin splints.
Understanding the specific triggers and biomechanical factors leading to this condition and sometimes seeking professional help to diagnose shin splints, is crucial for effective prevention and treatment.
Should I push through shin splints?
Taking a rest between physical activities is essential to give your muscles and bones the necessary time to recuperate. It’s vital to listen to your body and use any discomfort or shin pain as an indicator to moderate your activity level.
If you experience the sharp pain of shin splints, it’s advisable to decrease the intensity or frequency of your exercises until the pain subsides.
Trying to endure or “push through” the lower leg pain can exacerbate your condition and prolong recovery time.
Prioritising rest and recovery, along with a gradual return to activity, is key to prevent shin splints effectively and preventing future injuries.
Are shin splints serious?
Shin splints, characterised by discomfort along the inner edge of the shin bone (tibia), can vary in intensity from a mild annoyance to severe pain.
Although these conditions are generally not considered severe, the pain they cause can significantly hinder one’s ability to engage in favourite sports and physical activities.
This condition underscores the importance of understanding shin splints’ triggers and effective management strategies to maintain an active and healthy lifestyle.
Can I just ignore shin splints (Medial Tibial Stress Syndrome)?
Ignoring shin splints can lead to worsening symptoms and prolonged recovery times. This is particularly for individuals frequently engaged in high-impact activities like running, tennis, or basketball.
Common among athletes and fitness enthusiasts, shin splints show as discomfort and pain along the inner edge of the shin bone (tibia), often triggered by repetitive stress on the lower legs.
While shin splints are not typically regarded as a severe condition, they can significantly impede your ability to participate in physical activities and maintain an active lifestyle.
Running through the pain or neglecting proper rest and treatment can exacerbate the issue, underscoring the importance of addressing shin splints promptly and effectively to prevent further complications.
Do compression socks help with shin splints?
Compression socks play a crucial role in managing shin splints by providing targeted pressure that reduces swelling and prevents excess fluid buildup. They are an effective accessory for decreasing discomfort, minimising inflammation, and alleviating symptoms like stiffness and tenderness.
By improving circulation and stabilising the affected area, compression socks offer a dual-action solution— not only do they aid in reducing the immediate pain associated with shin splints, but they also support the overall healing process.
What exercise can you do for shin pain?
To effectively strengthen the lower leg muscles and support shin splint recovery, one beneficial exercise is the heel raise. Begin this exercise by standing with your heels hanging slightly off the edge of a step.
Ensure your legs remain straight throughout the movement. Gradually lift your heels as high as possible, then slowly lower them back down, creating a controlled motion.
Aim to maintain this position for 20 to 30 seconds, repeating the sequence 3 to 5 times.
Shin splint stretches are another way to help to improve painful shin splints.
This exercise routine not only targets the muscles around the shin but also engages the calf muscles, promoting strength and stability in the lower leg area.
If you or someone you know are having any issues with shin splints, or need advice or treatment for other sporting injuries and other problems, give us a call on 0298753760 or book an appointment on our website.
Pickleball might look light and easy from the sidelines, but biomechanically it’s a reactive, full-body sport. You need quick feet, fast reactions, rotation, reaching, lunging, and paddle control.
Your whole body works together as a chain when you play, this is called the kinetic chain. Power starts from your legs pushing into the ground, travels through your hips and core, up into your shoulder, down your arm, and finally to your wrist and paddle.
Because so many parts of the body work together, if one area is weak, stiff, or tired, another area ends up doing more work than it should. That’s when niggles start to show up. This is why a small niggle in the wrist can actually begin in the shoulder, or Achilles pain can come from poor hip control.
Here’s an easy breakdown of the biggest movements in pickleball, the muscles that help you perform them, and what can go wrong when the chain breaks down and one part isn’t pulling its weight.
Quick Movements, Acceleration & Lunging
Muscles involved
- Calves — push-off and quick direction changes
- Quadriceps — shock absorption and knee control
- Hamstrings — deceleration and braking
- Glutes — hip stability and direction changes
- Core — keeping the trunk stable while the legs move fast
Pickleball footwork is fast and unpredictable. Sudden accelerations, stops and lunges rely on these muscle groups to absorb force and keep joints aligned. These movements rely heavily on the calves for push-off power, the quadriceps for knee control, the hamstrings for braking, and the glutes and core for stability. If any of these muscles are weak or overloaded, the force of sudden direction changes shifts to the joints and tendons.
Weak calves force the Achilles tendon to work harder every time you push off or lunge, which is one of the most common sources of Achilles tendinopathy.
Weak glutes allow the knee to collapse inward during lunges or sidesteps, placing significant stress on the kneecap, patellar tendon, or even the meniscus.
When the hips don’t stabilise properly, the knee rotates excessively, the ankle compensates, and the Achilles becomes overloaded.
Pain might show up in the knee or heel, and players often think their Achilles or knee is the “problem,” but the true cause often sits much higher in the kinetic chain.
Groundstrokes (Forehand & Backhand)
Muscles involved
- Obliques — generate turning force
- Deep core (TA) — provide trunk stability
- Glutes — initiate rotation from the lower body
- Thoracic spine mobility — allows smooth twisting
Rotation should come from the hips and trunk, not just the arm. When the obliques, deep core or glutes are weak, pickleball players compensate by “arm-swinging” instead of rotating through the body. If your obliques, deep core, or glutes don’t generate rotational power, the shoulder must lift higher and reach further to compensate.
The rotator cuff becomes overworked, leading to irritation, impingement, or tendon overload. A stiff thoracic spine adds another layer, if your upper back can’t rotate, the shoulder must compensate through awkward angles.
When shoulder strength isn’t enough to generate power, players begin flicking their wrist harder to make up for it, which rapidly overloads the wrist tendons and even the TFCC (a common source of ulnar-sided wrist pain). This is why wrist, elbow, and even shoulder pain often stem from poor trunk rotation, not from a “wrist issue” at all.
Overhead Shots (Serves & Smashes)
Muscles involved
- Rotator cuff — keeps the shoulder joint stable
- Scapular stabilisers (lower traps, serratus anterior) — allow smooth overhead motion
- Deltoid + biceps — add power
- Thoracic spine mobility — positions the shoulder blade correctly
Effective overhead mechanics rely on a stable, well-controlled shoulder blade. If the lower traps and serratus anterior, the muscles that stabilise the scapula, are weak, the shoulder blade won’t rotate properly. This forces the rotator cuff to work much harder to keep the humeral head centred, which can quickly lead to cuff tendinopathy, impingement, or biceps tendon irritation. When the shoulder can’t generate enough power due to instability or poor posture, pickleball players begin relying on the forearm and wrist to produce force, causing wrist flicking, forearm tightness, and tendon overload. If the shoulder blade is unstable, everything downstream from it, elbow, forearm, wrist, is forced into compensation.
Net Play (Dinks, Volleys)
Muscles involved
- Forearm flexors/extensors — grip and wrist control
- Rotator cuff — stabilises shoulder for fine movements
- Scapular muscles — keep the shoulder positioned
- Core stability — maintains posture and keeps upper limb stable
Even small, precise paddle movements depend on a stable shoulder and trunk. If the rotator cuff or scapular muscles aren’t doing their job, the wrist ends up compensating by gripping harder and moving less efficiently. Over time, this creates extra tension in the forearm and increases the risk of tendinopathy, TFCC irritation, and elbow pain. Many players assume these are just “wrist problems,” but usually the wrist is only where the pain shows up — the real issue starts at the shoulder and scapula. That’s why treating the wrist alone often isn’t enough; the stability above it also needs to be addressed.
Takeaway
Across most common pickleball injuries, the same patterns keep showing up: weakness, poor control, tight muscles or fatigue in one part of the body often causes another part to compensate, which can quickly lead to overuse or joint problems.
The place that hurts is rarely the place causing the problem.
A physiotherapist looks at the whole system — strength, stability, mobility, technique, and footwork — to find where the breakdown is happening. When all parts are working together, players move more efficiently, generate more power, and stay injury-free on the court.
Don’t Wait — Listen to Your Body
A small niggle is your body warning you.
Ignore it long enough, and it becomes a problem that takes you off the court for weeks (or longer).
Early Signs You Shouldn’t Ignore
- Morning stiffness
- Pain that warms up but returns later
- Sharp or catching sensations
- Swelling
- Soreness lasting more than 24 hours after playing
The sooner you address these, the faster and easier the recovery.
Final Tips for Staying Injury-Free
- Warm up properly: dynamic movements, shoulder activation, calf warm-ups
- Strength train 2–3x/week (glutes, rotator cuff, calves, core)
- Increase playing time gradually
- Rotate your shoes regularly
- Rest or modify at the FIRST sign of a niggle
- See a physio early, you’ll save yourself months of frustration
If you are struggling with an injury after pickleball, or any sport for that matter, call us on 0298753760 or you can book online.
FAQ’s
Is pickleball a high risk sport
The intense cardiovascular demands of darting back and forth across the pickleball court can pose challenges for individuals with pre-existing heart conditions. Additionally, the rapid, sudden movements required on the hard surface of the pickleball court increase the risk of fractures, especially for pickleball players with low bone density or osteoporosis.
Is pickleball actually a good workout?
Yes, playing pickleball is an excellent form of exercise, delivering a cardiovascular and aerobic workout that enhances heart health, balance, flexibility, and muscle strength. As one of America’s fastest growing sports, pickleball offers a moderate-intensity fitness routine that can be easily adjusted to a higher intensity by increasing the speed and vigor of play.
This makes pickleball a popular choice for improving overall fitness, endurance, and coordination while enjoying a fun, social racket sport.
What are the negatives of pickleball?
Like any physical activity, pickleball poses health risks, especially for older adults and beginners.
Common injuries of pickleball include muscle strains, tennis elbow (lateral epicondylitis), rotator cuff injury, and ankle injuries. Players can experience pain in the knees, elbows, shoulders, and other joints due to sudden lateral movements and overuse.
Falls on the hard pickleball court can lead to wrist injuries, hand injuries, bone fractures such as Colles fractures, and other upper extremity injuries.
Additionally, playing pickleball can exacerbate existing conditions like hip arthritis and knee arthritis, making injury prevention and proper physical therapy essential for maintaining long-term joint health.
How not to get hurt before playing pickleball?
Warm up properly before playing pickleball to prevent common injuries in pickleball.
To reduce injury risk and improve performance in this rapidly growing sport, experts recommend dynamic warm-up exercises rather than traditional static stretching. Incorporating dynamic stretches such as walking lunges, arm circles, and high knee lifts to activate the muscles used in pickleball are good examples.
Additionally, a short jog or 30 seconds of jumping jacks can increase blood flow and prepare your musculoskeletal system for the quick, sudden movements on the pickleball court.
Proper warm-up is essential for pickleball players to prevent common injuries like muscle strains, knee sprains, and shoulder injuries.
What are the most common pickleball injuries?
Muscle strains and overuse injuries in pickleball are among the most common pickleball injuries experienced by players. These injuries often manifest as persistent shoulder pain or knee pain that gradually develops due to repetitive motions and excessive strain during play.
Unlike acute injuries, there may not be a single identifiable moment of trauma, making early recognition and proper treatment essential to prevent worsening symptoms and future injuries.
Pickleball might look light and easy from the sidelines, but biomechanically it’s a reactive, full-body sport. You need quick feet, fast reactions, rotation, reaching, lunging, and paddle control.
Your whole body works together as a chain when you play, this is called the kinetic chain. Power starts from your legs pushing into the ground, travels through your hips and core, up into your shoulder, down your arm, and finally to your wrist and paddle.
Because so many parts of the body work together, if one area is weak, stiff, or tired, another area ends up doing more work than it should. That’s when niggles start to show up. This is why a small niggle in the wrist can actually begin in the shoulder, or Achilles pain can come from poor hip control.
Here’s an easy breakdown of the biggest movements in pickleball, the muscles that help you perform them, and what can go wrong when the chain breaks down and one part isn’t pulling its weight.
Swim Smart: Training and Injury Prevention
Swimming is one of the most complete forms of exercise — low-impact, full-body, and meditative. But even though water cushions your joints, it doesn’t make you injury-proof. Shoulder impingement, knee pain from breaststroke, and lower back pain are the most common swimming injuries that can derail training if technique and recovery are ignored.
This guide explores how to build strength and efficiency in the water while keeping your body healthy and resilient.
It is vital to understand the demands repetitive overhead motion — particularly in freestyle and butterfly — can lead to overuse injuries if posture or alignment is out.
Each stroke uses muscles differently:
- Freestyle & Backstroke engage the rotator cuff, lats, and core for rotation and propulsion.
- Breaststroke stresses the knees and hips with repetitive whip kicks.
- Butterfly requires explosive power and flexibility through the shoulders, back, and spine.
Therefore, warm up like an athlete, not a casual swimmer. Perform the following five- to ten-minute dry-land warm-up prior to hitting laps to wake up key stabilising muscles and reduce shoulder pain.
You can try:
- Arm circles, banded external rotations, and scapular push-ups
- Hip bridges and dynamic lunges
Then commence your swim with a few minutes of easy kicking or sculling once in the pool, your joints “primed” before repetitive motion.
Technique First, Volume Second
Swimming rewards precision, with poor alignment or breathing technique multiplying stress with every stroke. A coach’s eye, even occasionally, can prevent months of self-reinforced poor technique. Whether you’re training for fitness, triathlon, or competition, understanding how swimming injuries develop, the importance of proper technique — and how physiotherapy can help — is key to staying healthy in the water.
Physiotherapists identify the specific structures involved when pain arrives (e.g. rotator cuff vs. labrum), assessing how stroke mechanics, training load and muscle imbalances contribute to pain. They help design a graded return-to-swim plan, adjusting volume, intensity, and technique to allow recovery without complete rest — vital for maintaining conditioning.
These plans focus on shoulder blade control, rotator cuff endurance, and core strength — areas often neglected in pool training.
Stroke mechanics
- Joint laxity or hypermobility – common in younger or elite swimmers, leading to micro-instability and cumulative stress.
- In freestyle, keep a high elbow catch and avoid crossing the midline. A dropped elbow or early hand pull will increase the load on the front of the shoulder. In the recovery phase poor scapular control or over-rotation can lead to impingement.
- Engage your core — your spine should rotate, not sway. In butterfly this is crucial, requiring not only core stability but thoracic extension. Limited mobility in these regions force the shoulder to overwork and force compensations.
- Breathe bilaterally when possible to maintain muscular balance, otherwise you may get tightness on the breathing side and weakness on the opposite.
- Use fins, pull buoys, or paddles sparingly — they should refine technique, not compensate for weakness.
Training load
The shoulder is built for mobility not endurance mileage, so overuse injuries happen when the tissue load exceeds recovery capacity.
- Sudden increase in swimming volume, either distance or intensity (greater than 10-15% increase)
- Excessive use of resistance paddles and bands without an adequate strength base
- Insufficient recovery, sleep or nutrition
- Poor dry-land preparation – weak rotator cuff or core control
Physiotherapy will implement a load monitoring plan, tracking distance, intensity and perceived exertion. Programs to prepare for competition are designed around ‘periodisation’, balancing a ratio of swim volume to strength work. Training intensity is kept high, incrementally increased to prepare the specific energy system suited to that event, think anaerobic for short distance and aerobic for longer swims. Closer to the event the volume of training is reduced but the intensity increased, whilst still ensuring adequate recovery.
Muscle imbalances
Dry-land exercise training complements swim time to correct muscle imbalances, enhancing propulsion and reducing repetitive stress.
- Assessment of internal rotators (pecs, lats) which are often strong, overpowering weaker external rotators and stabilisers (infraspinatus, lower trapezius, serratus anterior).
- Mobility drills to release tight structures: pec stretch (doorway stretch), posterior capsule stretch (cross-body arm stretch), thoracic mobility with “thread the needle” rotations”, scapular setting with wall slides that focus on downward control.
- Shoulder stability: banded external rotations, Y-T-W raises, planks (plus shoulder taps) and punches lying on the back for the serratus anterior
- Core control: planks, dead bugs, anti-rotation exercises
- Leg drive: squats, glute bridges, single-leg work
- Mobility: thoracic spine rotation, hip openers, and posterior chain stretches
Strength training two to three times a week can dramatically cut injury risk and improve power in the water. Many physiotherapists now work alongside swim coaches, using video analysis to identify faulty movement patterns — such as crossing midline in freestyle or asymmetrical breathing. This integrated approach addresses the root cause of pain, not just the symptoms.
Advanced dry land work simulates swimming mechanics and builds kinetic chain efficiency.
- Standing “swim pulls” with resistance band – mimic freestyle catch, focusing on scapular retraction and trunk rotation.
- Medicine-ball rotational slams – integrate core and shoulder power.
- Single-arm cable rows with rotation – encourage controlled pull-through phase.
- Overhead kettlebell carries – strengthen shoulder stabilisers under load.
Respect Recovery to Prevent Swimming Related Injuries
Swimming athletes know recovery is as strategic as training incorporating stretching, mobility drills, and active rest days to manage fatigue across training cycles.
- Alternate hard and easy sessions to allow tissues to adapt.
- Stretch or use a foam roller post-session, focusing on shoulders and lats.
- Prioritise sleep and hydration — both crucial for muscle repair.
- Watch for warning signs: persistent soreness, reduced range of motion, or clicking joints.
If you feel pain that persists beyond a few sessions, don’t “push through it.”
Early physiotherapy assessment prevents small issues from becoming chronic.
Mindset: Consistency Over Intensity
Progress in swimming — like any endurance sport — depends on sustainable effort.
Injury prevention strategies aren’t about avoiding hard work; it’s about staying in the game long enough to improve. Train smart, listen to your body, and let discipline, not exhaustion, set the tone for your sessions.
Takeaway on Swimming Injury Prevention
Swimming should build your health, not compromise it. The key is to train smart, listen early, and respect the fine line between fatigue and injury. Physiotherapists play a vital role in that journey — helping you move better, recover faster, and return stronger.
Whether you’re chasing PB’s or simply swimming for health, don’t wait for pain to appear before seeking help. Early assessment and tailored prevention can keep you gliding through the water for years to come. With proper swimming techniques, structured strength work, and respect for recovery, you’ll move faster, feel stronger, and stay pain-free year-round.
Come see a physiotherapist if you notice:
- Pain at the front or side of the shoulder during or after training
- Reduced range of motion or strength
- Clicking or catching during stroke recovery
- Pain lying on the affected side at night
Book online or call us on 02 9875 3760
FAQ’s
What is the most common injury in swimming?
Shoulder injuries are the most common swimming injuries, affecting between 40% and 91% of competitive swimmers, often resulting from repetitive overhead motion and rotator cuff muscle strain. Knee injuries, particularly knee overuse injuries like breaststroker’s knee, are also a significant cause of morbidity among elite swimming athletes, impacting their performance and training consistency.
Is swimming a high risk sport?
Although swimming is widely recognised as a low impact sport with numerous health benefits, the intense training and physical demands involved in competitive swimming can increase the risk of swimming related injuries. Both experienced and inexperienced swimmers may suffer from sports injuries due to improper technique, overtraining, or lack of adequate recovery. Most swimming injuries are overuse injuries, resulting from repetitive motions and cumulative stress on muscles, tendons, and joints, particularly affecting the shoulder joint, knees, and lumbar spine.
Is swimming hard on your body?
While swimming is not necessarily always easy, it is a low-impact sport that takes much less of a toll on your body than high-impact activities like running or cycling. This is because exercising in water reduces the stress on your joints and muscles, making it an excellent choice for injury prevention, rehabilitation, and improving cardiovascular health without the risk of overuse injuries common in land-based sports.
Tennis is one of the most popular sports in the world — fast, fun, and a great way to stay fit. Unfortunately, it also carries with it a number of common tennis injuries.
If you play tennis regularly, you know the game is about more than powerful serves and forehands — it’s also about quick footwork, lunges, and constant change of direction. These movements place a lot of stress on the muscles of shoulder, forearm and inner thigh, and joints like the wrist, knee and ankle. When these muscles and joints are pushed beyond their limit, a muscle or ligament strain can occur.
These injuries are common among tennis players of all levels, from beginners to professionals, but with the right knowledge you can recover well and reduce your risk of future problems.
The good news? Most tennis related injuries are preventable, and when they do occur, recovery is usually straightforward with the right care and rehabilitation. This guide covers the most common tennis injuries — what they are, how they happen, and what you can do to recover from them.
Need additional support? We’re here to help: give us a call on +61 02 9875 3760 or book online for a comprehensive physiotherapy assessment and plan tailored to your injury.
Groin Strain (Adductor Injury)
A strain or tear of the inner thigh muscles, often from lunging or stretching wide for a shot.
Symptoms
- Sharp pain in the groin or inner thigh.
- Pain when squeezing legs together or lunging.
- Possible swelling or bruising.
Treatment
- Early rest, ice, and compression (Tubi grip or sports compression tights).
- Manual therapy including soft tissue release, heat, TENS and therapeutic ultrasound.
- Gait aid prescription, such as crutches, to aid in mobility.
- Gradual adductor strengthening prior to stretching (static adductor holds to lateral lunge pulses before opening the hip with deeper stretching).
- Hip and knee stability strengthening (glute sets to bridges, lunges to step ups).
- Balance and agility drills including lateral change of direction, whilst progressively increasing training intensity. Assessment of potential underlying deficits such as poor ankle stability or knee control.
- Home exercise prescription and education on return to sport loading including warm up programs (dynamic movements without load) and continual strengthening to keep hip muscles strong and balanced.
Tennis Elbow (Lateral Epicondylitis)
Overuse of the forearm extensor muscles, leading to tendon irritation at the outside of the elbow. Tennis elbow injuries are not only specific to tennis, but this condition also happens in office workers (poor mouse ergonomics) and the weekend gardener (mowing and power tool use fresh after a quiet winter).
Symptoms
- Pain on the outside of the elbow or forearm muscle belly (just below the elbow).
- Grip weakness or pain with gripping tasks (like chopping vegetables).
- Pain worsens with backhand strokes (or more gardening!).
Treatment
- Rest from aggravating play (or gardening or domestic tasks).
- Ice packs after play.
- Manual therapy including soft tissue release, heat, TENS and therapeutic ultrasound.
- Physiotherapy-guided eccentric loading exercises. Both excessive gripping and wrist extension actions contribute to this condition, so rehabilitation requires separating these movements. We want to gradually load the tendon without flaring it up. As the tendon recovers, we can re-combine actions to simulate sport and work scenarios in preparation for return.
- Braces for short-term relief (should you HAVE to return to play or those necessary domestic tasks) and during rehabilitation to spread the load over a larger muscular surface area to aid in recovery. These braces can be for the wrist or elbow, depending on your injury.
- Modifications to the grip size of the racket, power tool or chopping knife. Strengthening to reduce the level of grip required for control and ensuring wrist is kept neutral (power comes from the arm, not a flick of the wrist, which is a common compensation we may not be aware of).
- Strengthening the opposite side of the forearm (how is your forearm stroke?) and shoulder (are you a regular volleyer or smasher?)
Rotator Cuff Injury (Shoulder Pain)
A rotator cuff injury involves irritation or small tears in the shoulder’s stabilising tendons, usually from repetitive serving or a powerful return.
Symptoms
- Pain during serves, overhead shots, or extending the arm out for a wide forehand.
- Weakness or reduced range of motion.
- Night pain when lying on the shoulder, a dull ache that persists throughout the day or sudden pain on particular movement.
Treatment
- Rest from overhead strokes and aggravating positions.
- Manual therapy including soft tissue release, heat, TENS and therapeutic ultrasound.
- Physiotherapy to improve engagement of the rotator cuff in synergy with the scapula. If the injury is extensive the initial exercises movements are totally passive (no muscle engagement). Exercises then progress to active arm movements with a bend in the elbow to de-load the rotator cuff, and assistance comes from the other arm (known as ‘active assisted’ exercises). Progressively we load the arm in different directions before combining movement to simulate sport specific movements, including load and speed. Everyone is unique in their rehabilitation, so we highly recommend an individualised program to safely progress a rotator cuff injury.
- Strengthening of the upper and lower back to cooperate with the shoulder for power and stroke control, so you are your best when returning to the court. Best not to overload your serve volume to prevent re-injury and warm up once on the court itself.
Ankle Sprain
An ankle injury is a ligament injury caused by rolling or twisting the ankle, common during rapid directional changes.
Symptoms
- Pain, swelling, and bruising.
- Difficulty bearing weight and moving the foot.
Treatment
- Initially RICE (Rest, Ice, Compression, Elevation). More significant ankle rolls may require a crutch to aid in mobility.
- Manual therapy including soft tissue release, heat, TENS and therapeutic ultrasound.
- Physiotherapy to recover ankle range (Theraband press downs and pull ups, then light movements inwards and outwards). Often, the side movements require static holds for 10 seconds before progressing to short repetitions to aid tendon healing. Calf stretching and progressive strengthening, with the aim of achieving stable single leg calf raises, then balance tasks are added.
- Bracing/taping during return to play. The importance of upcoming game(s) and events is discussed as it is always a balance between early return to play versus allowing longer recovery time. We have a collaborative discussion about return to sport timelines.
- Gait review and analysis of the medial arch of the foot. We have high quality sports orthotics to support people with less arch support that goes beyond the arch support in even the most supportive footwear. These can be moved between work and sports shoes and provide firm yet pliable support for impact activities.
- Once you have had an ankle sprain you are more likely to have another, though this shouldn’t stop us returning to activities we enjoy. The opportunity is to continue to work on balance and proprioception beyond acute injury recovery to continue to enjoy the sport.
Knee Injuries (Patellar Tendinopathy / Meniscus Issues)
Stress on the knee from repetitive jumping, sprinting, or twisting.
Symptoms
- Front-of-knee pain (jumper’s knee).
- Swelling or catching if meniscus affected.
- Pain with squats, running, or stairs.
Treatment
- Rest and load management. Often our medial (inside) quadricep muscle is weak, causing poor loading across the patella tendon that runs over the knee.
- Eccentric quadriceps strengthening. Later in the rehabilitation phase we focus on strength control required during stepping downstairs and prevention of knee hyperextension
- Taping or supports if needed. Like ankle injuries, these supports are used to speed recovery and graded return to activities.
Playing tennis is demanding on the body, but most common tennis injuries share a theme: they come from overuse, poor mechanics, or sudden, intense movements.
The key is to:
- Warm up properly.
- Strengthen supporting muscles.
- Train movement patterns, not just strokes.
- Listen to your body and rest before small pains become big problems.
If you do get injured playing tennis, early physiotherapy can speed recovery and reduce your risk of recurrence.
With the right approach, you can stay healthy, improve performance, and enjoy tennis for years to come.
Give us a call on +61 02 9875 3760 or book online for a comprehensive physiotherapy assessment, exercise program and plan tailored to your injury.
For more information, we have posted a blog about tennis injuries, shoulder injuries, and physiotherapy for a sprained ankle.
Tennis Australia in South Australia also posted information on common tennis injuries.
References
- Abrams GD, Renstrom PA, Safran MR. Epidemiology of musculoskeletal injury in the tennis player. Br J Sports Med. 2012;46(7):492–498.
- Serner A, van Eijck CH, Beumer BR, et al. Study methodology of groin injuries in athletes: a systematic review. Br J Sports Med. 2015;49(12):775–781.
- Kaux JF, Forthomme B, Goff CL, Crielaard JM, Croisier JL. Current opinions on tendinopathy. J Sports Sci Med. 2011;10(2):238–253.
Marathon training is an inspiring commitment, but it’s as much a science as it is a discipline. A marathon is an endurance event. It is typically a long-distance race that requires careful pacing, fueling strategies, and preparation for sustained physical effort. Whether you’re gearing up for your first 10km or chasing a marathon personal best in the full marathon distance of 26.2 miles (42.195 kms), distance running places high demands on the body. It takes commitment and planning to get marathon ready.
As physiotherapists, we often see the consequences of poor preparation: overuse injuries, fatigue, burnout, and missed race goals. For experienced runners, training goals and strategies may differ from those of beginners, with a greater focus on performance optimisation and advanced recovery techniques. These setbacks rarely stem from a lack of motivation, rather, they usually result from training errors: doing too much too soon, without adequate strength or recovery planning.
The good news? Most runners can avoid many of these issues by following evidence-based strategies. With smart programming, structured strength training, and a proactive approach to recovery, the marathon journey involves more than just physical preparation—it also requires mental resilience and brings a profound sense of achievement. Progressing safely is key to avoiding injury and ensuring long-term success. This blog will guide you through building a safer, more effective marathon plan. It will help you train smarter, avoid setbacks, and cross the finish line feeling strong.
Introduction: The Marathon Mindset
Training for a marathon is more than just a physical challenge—it’s a test of mental strength, discipline, and perseverance. Whether you’re a complete beginner or a seasoned runner, adopting the right marathon mindset is key to a successful training journey. A well-structured marathon training plan will help you gradually build endurance. It will increase your weekly mileage, and prepare your body for the demands of the marathon distance. Setting realistic goals, sticking to a consistent training routine, and balancing intense training sessions with adequate rest are all crucial elements. By approaching your training with focus and flexibility, you’ll be better equipped to overcome obstacles. You will stay motivated, and ultimately cross the finish line with a sense of accomplishment.
Injury Prevention Is a Priority
Up to 70% of runners experience an injury each year, with common issues including patellofemoral pain syndrome, Achilles tendinopathy, iliotibial band syndrome, plantar fasciitis, and medial tibial stress syndrome. These conditions rarely appear suddenly. They usually develop gradually due to poor load management, muscle imbalances, or lingering issues from old injuries.
Recreational runners face an incidence of approximately 10 injuries per 1,000 hours of running, with around 30% sustaining an injury over a 12-week period. Old injuries often resurface as training volume increases — for example, a poorly rehabilitated ankle sprain or past back strain may become symptomatic again under load.
One study of 200 runners found that 28% of injured runners sustained a recurrent injury, suggesting incomplete recovery or lingering deficits. Most notably, a prior injury within the past 12 months is the strongest predictor of future running-related problems. Some studies show up to a 90% higher injury rate in this group. These findings highlight the need to fully address underlying deficits before ramping up training loads. A structured recovery process after injury is essential to ensure full rehabilitation and reduce the risk of recurrence.
Further reading
- Van Gent, R. N., Siem, D., van Middelkoop, M., van Os, A. G., Bierma‑Zeinstra, S. M. A., & Koes, B. W. (2007). Incidence and determinants of lower extremity running injuries in long distance runners: A systematic review. British Journal of Sports Medicine, 41(8), 469–480. https://doi.org/10.1136/bjsm.2006.033548
- Cloosterman, K. L. A., Fokkema, T., de Vos, R. J., Visser, E., Krastman, P., IJzerman, J., Koes, B. W., Verhaar, J. A. N., Bierma‑Zeinstra, S. M. A., & van Middelkoop, M. (2020). Enhanced injury prevention programme for recreational runners (the SPRINT study): Design of a randomised controlled trial. BMJ Open Sport & Exercise Medicine, 6(1), e000780. https://doi.org/10.1136/bmjsem-2020-000780
- Brandt‑Frandsen, J. S., Simonsen, N. S., Hulme, A., Jacobsen, J. S., & Nielsen, R. Ø. (2024). A paradigm shift in understanding overuse running-related injuries: Findings from the Garmin-RUNSAFE study point to a sudden not gradual onset. JOSPT Open, 3(1), 85–92. https://doi.org/10.2519/josptopen.2024.0075
- Desai, P., Jungmalm, J., Börjesson, M., Karlsson, J., & Grau, S. (2021). Recreational runners with a history of injury are twice as likely to sustain a running-related injury than runners with no history of injury: A one-year prospective cohort study. Journal of Orthopaedic & Sports Physical Therapy, 51(3), 144–150. https://doi.org/10.2519/jospt.2021.9673
The Importance of Load Management
Most marathon training plans need some assistance. Training errors account for up to 60% of running-related injuries. A widely used principle is the 10% rule, avoid increasing your weekly running routine by more than 10%. While not absolute, this guideline is supported by research linking sudden increases in load to a higher risk of bone stress injuries, tendinopathies, and muscle strains. Building up to a certain number of miles per week is a key part of marathon training. It helps ensure your body adapts gradually to increased demands.
For example, a large cohort study of over 5,000 runners found that exceeding your longest monthly run by just 10–30% increased injury risk by 64%, while more than doubling it more than doubled the risk. Systematic reviews echo these results, showing that abrupt increases in distance, frequency, or intensity are major contributors to overload.
To avoid this, physiotherapists recommend structuring training plans over 12 to 20 weeks. Adjust to your fitness level, and incorporate deload weeks every 3 to 4 weeks. These planned reductions in training volume allow your body’s tissues time to adapt and recover, supporting steady progress and safer endurance gains. Following a structured training plan is essential to ensure you progress safely and effectively toward your marathon goals.
For those starting out, being able to run a few miles consistently provides a sufficient base to begin marathon training. This foundation allows you to gradually increase your mileage and reduce the risk of injury.
Building Endurance: The Heart of Marathon Training
At the core of every effective marathon training plan is the steady development of endurance. Most marathon training plans are designed to gradually increase your weekly mileage, allowing your body to adapt safely to the demands of long distance running. A typical training program will include a mix of easy running, tempo runs to build speed and stamina, and long runs that prepare you for the marathon distance. Incorporating rest days and cross training sessions—such as cycling or swimming—helps prevent burnout and supports muscle recovery. Strength training and hill repeats are also valuable additions, improving running efficiency and reducing injury risk. Over the course of 16 to 20 weeks, your training plan should focus first on building a strong endurance base. It should then shift towards race-specific preparation and tapering in the final weeks, ensuring you arrive at race day feeling fresh and ready to perform.

Cross Training: The Unsung Hero
Cross training is a powerful yet often underestimated tool in marathon preparation. By adding activities like cycling, swimming, or strength training to your weekly routine, you can boost your overall fitness level while giving your running muscles a much-needed break. Cross training not only helps prevent overuse injuries by reducing repetitive impact, but it also enhances cardiovascular endurance and supports muscle balance. Many marathon runners find that replacing one or two weekly running sessions with cross-training activities keeps their training fresh and enjoyable, while still challenging their bodies in new ways. This approach allows for active recovery, helping you maintain momentum in your marathon training without increasing your risk of injury.
Marathon Gear and Equipment
Equipping yourself with the right gear is essential for a smooth and successful marathon training experience. Start with a quality pair of running shoes that suit your gait and provide the support you need for high weekly mileage. Comfortable, moisture-wicking clothing can help prevent chafing and keep you cool during long runs.
Finding the right running shoes is essential for any marathon training plan. The right shoes don’t just make your runs more comfortable—they play a critical role in preventing injuries and boosting your performance.
When choosing the right shoes, start by considering comfort. A good pair should feel natural as soon as you try them on. Next, evaluate support—shoes should provide the right level of stability to match your stride and foot type. Durability is another key factor, as marathon training involves hundreds of kilometres of running, so look for shoes built to withstand the demands of long-distance running. Shoe choice may also depend on the type of road race course you’ll be running, whether it’s an urban, spectator-lined route or a scenic, rural road race, as each presents unique demands on your footwear. Most importantly, ensure a proper fit. Shoes that are too tight can cause blisters, while loose ones may lead to instability and discomfort.
Accessories like a running watch, headphones, or a running belt can make your training sessions more enjoyable and efficient. For longer distances, consider a hydration pack or handheld bottle to stay properly hydrated. Experiment with energy gels or electrolyte tablets to maintain your energy levels. By investing in the right marathon gear and equipment, you’ll not only enhance your performance but also reduce your risk of injury and make your training journey more enjoyable.
Nutrition and Hydration: Fueling Your Finish
Proper nutrition and hydration are the backbone of marathon training success. To support your training and recovery, focus on a balanced diet rich in complex carbohydrates for sustained energy, lean protein for muscle repair, and healthy fats for overall health.
Staying hydrated is equally important—drink water consistently throughout the day and consider electrolyte-rich fluids during longer training runs.
Practice your race day fueling strategy by using energy gels, bars, or other sports nutrition products during your long runs, so your body is accustomed to them before the big day. By prioritising proper nutrition and hydration, you’ll optimize your performance, speed up recovery, and give yourself the best chance of reaching the marathon finish line feeling strong and accomplished.
Marathon Training: Strength Training, Your Secret Weapon
Contrary to popular belief, strength training doesn’t slow runners down, it makes them stronger, more efficient, and more resilient.
In fact, strength training can reduce sports injury risk by approximately 66%, outperforming stretching and proprioceptive training. Supervised programs are particularly effective, as they ensure proper technique, appropriate loading, and progression.
In endurance-specific studies, resistance training has also been shown to improve running efficiency by 2–8%, meaning you use less energy at the same pace. Strength training also enhances running economy, with research showing improvements of 8–12%, making runners more efficient over long distances. Strengthening the glutes, hamstrings, quadriceps, calves, and core enhances shock absorption, reduces stress on vulnerable tissues, and promotes optimal movement patterns.
For best results, aim for two strength sessions per week during your base training phase. As mileage builds, maintaining at least one session per week helps sustain strength gains, particularly when done under supervision to avoid poor form and overtraining. Incorporating speed work and speed sessions, such as intervals, tempo runs, and hill repeats, alongside strength training can further improve performance, running economy, and resilience.
Further reading
- Lauersen, J. B., Andersen, T. E., & Andersen, L. B. (2018). Strength training as superior, dose-dependent and safe prevention of acute and overuse sports injuries: A systematic review, qualitative analysis and meta-analysis. British Journal of Sports Medicine, 52(24), 1557–1563. https://doi.org/10.1136/bjsports-2018-099078
- Wu, H., Brooke-Wavell, K., Fong, D. T. P., Paquette, M. R., & Blagrove, R. C. (2024). Do exercise-based prevention programs reduce injury in endurance runners? A systematic review and meta-analysis. Sports Medicine, 54(5), 1249–1267. https://doi.org/10.1007/s40279-024-01993-7
Marathon Training Plan: Push or Pause? Listening to Your Body
A vital part of smart training is knowing the difference between normal muscle soreness and problematic pain. While DOMS (delayed onset muscle soreness) is expected after training, sharp, persistent, or escalating pain should never be ignored.
A simple guide
Normal Signs (safe to run through)
- Mild soreness that settles with movement
- Muscle stiffness after hills or intervals
- Fatigue that improves with rest
Warning Signs (should modify or pause)
- Pain that alters your running form
- Sharp joint or tendon pain
- Night pain or pain lasting >48 hours
- Pain rated over 3/10 during activity
- Recurrent pain in the same area
Ignoring early warning signs can turn a small niggle, like calf tightness, into Achilles tendinopathy, potentially requiring weeks or months of rehab. Early intervention via physiotherapy can keep you training and reduce time lost to injury.
Race Recovery Isn’t Lazy – It’s Training
Your body adapts and grows stronger during recovery, not during the run itself and yet many runners overlook this phase. Poor sleep, low protein intake, and emotional stress can all impair tissue repair and increase injury risk. Replenishing glycogen stores through adequate carbohydrate intake is crucial for optimal recovery and sustained energy during the recovery process.
Key recovery pillars
- 7–9 hours of quality sleep per night
- Protein and complex carbohydrates in every meal
- Active recovery (e.g. walking, swimming, yoga) to boost circulation
- Rest or deload weeks every 3–4 weeks to allow for tissue adaptation
Some athletes also benefit from techniques like saunas or cold immersion, but the evidence on these remains mixed. Ultimately, it’s consistency in basic recovery practices that builds long-term resilience — not extreme tools.
Spotting Weak Links Early
Do you notice
- One side working harder during runs?
- Tightness in the same hip flexors or calves every week?
- Knees collapsing inward when fatigued?
- Recurring foot pain, low back stiffness, or tendon flare-ups?
These are red flags of biomechanical imbalances. A physiotherapy assessment can identify subtle movement deficits, muscular weaknesses, or joint restrictions, helping you correct them before they evolve into injury.
For runners with a history of low back pain, knee injuries, or tendon issues, regular prehab check-ins with a physiotherapist can make the difference between reaching your start line or sitting it out.
Final Thoughts: It’s a Long Run, Not a Sprint
Marathon training isn’t just about logging kilometres, it’s about building a resilient, efficient, and well-prepared body. The journey of a marathon runner is marked by dedication, discipline, and overcoming the unique physical and mental challenges of the marathon race. Injuries often stem from unaddressed weaknesses, rapid load increases, and neglected recovery. By taking a proactive approach, you can train smarter and perform better. Achieving race day success depends on consistent training, thorough preparation, and developing mental resilience.
Key takeaways
- Prior injuries are the strongest predictors of future injury
- Sudden load spikes significantly increase risk
- Strength training is proven to reduce injury and improve performance
- Recovery is essential and should be structured, not skipped
- Early signs of dysfunction should prompt physiotherapy input
So train smart, run strong, and invest in your body long-term. Whether you’re tackling your first marathon or your fifth, a good physiotherapist can help you identify weak links, optimise performance, and stay on track. Don’t wait for pain to force rest. Be proactive, get assessed early, and make your physiotherapist part of your training team.
If you are training for a marathon, or looking for the right way to start training, you can call us on 0298753760, or feel free to book online.

FAQ’s
How long does it take to realistically train for a marathon?
The recommended marathon training plan spans 16 to 20 weeks, offering your body ample time to gradually adapt to increasing mileage and workout intensity.
This approach minimises the risk of common running injuries like shin splints or runner’s knee and helps prevent burnout, ensuring optimal endurance and performance on race day.
What is the 10 10 10 rule for marathons?
To optimise your marathon pacing strategy and finish strong, consider breaking the race into three key segments.
Start the first 10 miles with a conservative pace to conserve energy. For the next 10 miles, shift to a steady goal pace that aligns with your marathon training plan.
Finally, approach the last 10 kilometres with everything you’ve got, pushing hard in the “finish strong” phase to maximise performance.
This structured pacing method can help prevent burnout, improve endurance, and ensure a more effective race day execution.
Can an unfit person run a marathon?
The short answer is no.
Running a marathon is a major physical and mental achievement, but it’s not something you should tackle without the right preparation. Proper marathon training is essential to build endurance, boost cardiovascular fitness, and prevent common running injuries. Skipping training not only puts unnecessary strain on your body but also diminishes the rewarding experience of crossing that finish line.
Consistent training helps improve stamina, optimise running form, and develop the mental toughness needed to conquer those challenging 26.2 miles. Without it, you risk burnout, muscle fatigue, and even serious health complications during the race. A carefully planned running schedule, paired with strength training and proper nutrition, ensures you’re race-day ready.
Don’t underestimate the importance of preparing for a marathon. A solid training plan doesn’t just make those miles feel manageable—it makes them enjoyable. If you’re ready to take on the challenge, start today by finding a training program that suits your fitness level.
What is the best marathon strategy?
Looking to achieve your fastest marathon time? The right pacing can make all the difference. Marathon pacing tips often emphasise the importance of controlling your effort throughout the race to avoid burnout. Research consistently shows that the best marathon race strategy is to stick with either an even split marathon strategy–maintaining consistent pace throughout–or a positive split marathon pacing approach, where the second half is slightly slower than the first.
These strategies allow runners to conserve energy early on while ensuring a strong finish. For most athletes, avoiding erratic pace changes or starting too fast lays the foundation for success on race day.
More posts